advent calendar directions

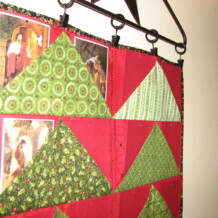
Okay, okay, okay. I guess people aren’t getting how my adorable quilted creation is an advent calendar. Soooo, I will explain.
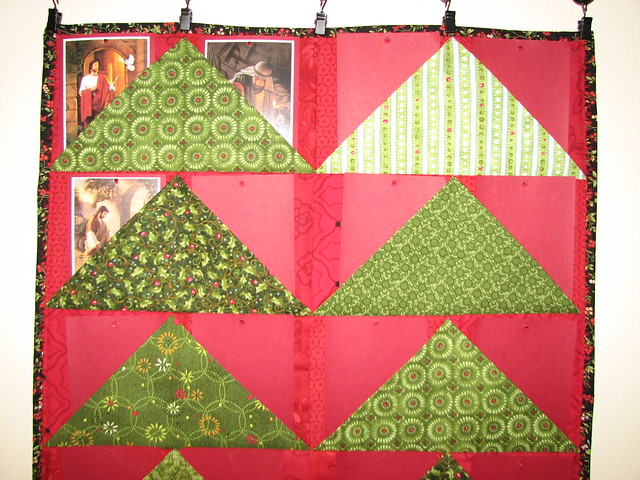
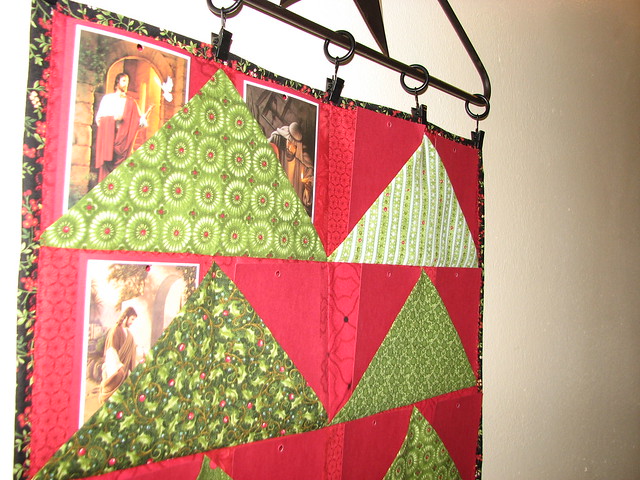
The trees are pockets! They hold whatever you want to put in them to count down the days till Christmas or whatever else you want to count down to. You could put in candy or presents or a card with the carol you want to sing that night or whatever. We are putting our Jesus pictures in ours.
There are 12 trees with two pockets on each, so 24 days total. We will count down from the 1st to Christmas Eve by turning over a picture of Jesus each day.
Here is what ours looks like so far..with three pictures turned over and the rest still backwards.
Get it? Brilliant, yes?
Okay, so here are the sewing directions in my most completely non-technical, non-seamstress-y way.
1. After you have made your flying geese pieces as instructed here, then you need to arrange all your pieces the way you want them to be.
2. Make sure your seams are pressed the opposite way from the piece on top of it.
3. Sew your tree lines together to make two trees per row (or two trunks for the bottom piece).
4. At this point you need to get your back ready. My front measured 18″ x 29.5ish”, so we cut the back 20″ x 32″ and cut the batting the same.
5. Iron your batting onto the wrong side of your backing. They will kind of adhere to one another…Kat calls this hugging.
6. Then lay your top tree line near the top of your batting…give yourself a little bit of room…like 1/2″ or so.
7. Lay your next tree line below it and then fold it up onto the top tree line so right sides are together and your center seam is lined up. Pin and sew through all layers with a 1/4″ seam. This will quilt your fabric together while you are sewing it. I think it is called quilt-as-you-go method???
8. Press flat, then fold down and press seam open.
9. Lay the third treeline under the second and repeat steps 7 and 8.
10. Lay the fourth treeline under the third and repeat steps 7 and 8.
11. Keep repeating until you have done all six rows of trees and the trunk line.
12. Shout hallelujah and praise the Lord that you have finished the top!
13. Trim the excess batting and backing so all your edges are even.
14. Get your binding fabric ready by either using bias tape or making your own binding fabric by cutting fabric and sewing strips together. I cannot describe this process to you…just google it and I’m sure you will find some directions that will make more sense to you than anything I could say.
15. I pressed my binding fabric in half and then lined up the raw edge with the edge of my top and sewed a 1/4″ seam all the way around. At each corner, sew until you get 1/4″ from the corner, then fold in the fabric to make a 45 degree angle on the corner and fold the top to make a 90 degree angle that lines up with your new side you will be sewing down. Okay, that didn’t make a lick of sense…just google it and once again, I’m sure you will find some awesome directions. Here are some I found: Sew Inspired and Oh Frannson. Both of those however sew the back on by hand, which I would never in a million years be able to do…if you can believe it, my hand sewing is even worse than my machine sewing – I have NO fine-motor coordination.
16. Clip your corners…just a little bit to remove excess fabric.
17. Press your binding seam on the top of your quilt and then turn it over and fold the binding to the back, pressing as you go. Make your mitered corners have balanced, attractive 45 degree angles and press into place.
18. Choose a stitch that is wavy so that it will be able to catch both the front and back pieces of binding in the same stitch. I used a vine stitch that turned out quite lovely. This type of stitch is very forgiving and allows you to mess up without a disaster resulting. Start sewing somewhere other than a corner and when you get to the corner, make sure your mitered corner looks good and sew into it a little bit to make sure you catch all the edges. Continue sewing around till you are done.
19. Fall to your knees with gratitude that you are FINISHED!
I have probably missed some steps, but that is what I can remember right now. Kat? Do I need to add anything else?
For those of you that can sew, this would be an easy-peasy project. For me, it took a whole-lotta effort.


 I'm Tracy, a mama with big dreams, crazy ideas, loads of laughter, an insatiable desire to learn, and enormous piles of laundry.


So glad that you explained – I LOVE it!! Not even going to attempt to read the instructions, tho. I sadly just don’t have a Kat here.
Tracy, nice directions. I don’t think you left anything out.