advent calendar directions

Dec 4, 2011 by

advent calendar directions

Okay, okay, okay. I guess people aren’t getting how my adorable quilted creation is an advent calendar. Soooo, I will explain.

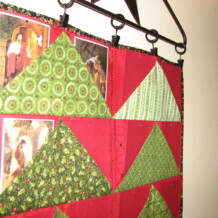
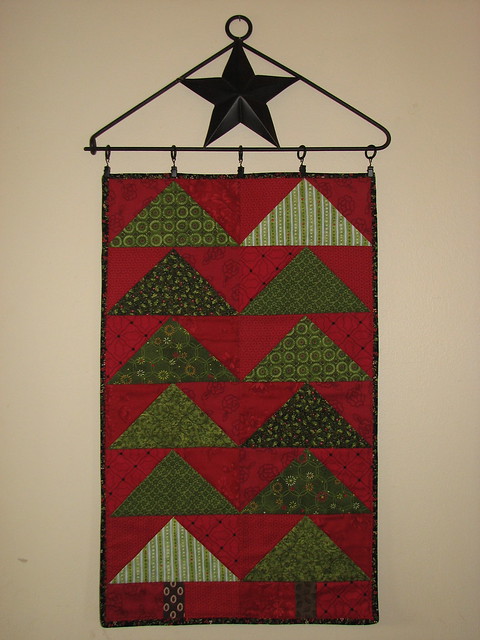
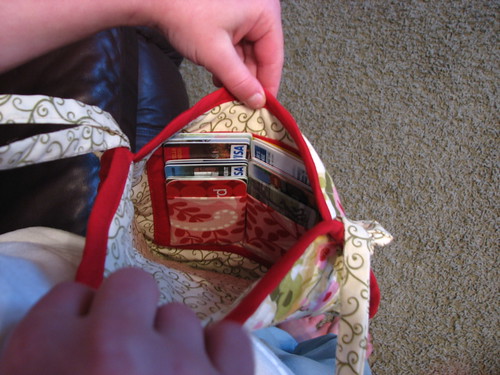
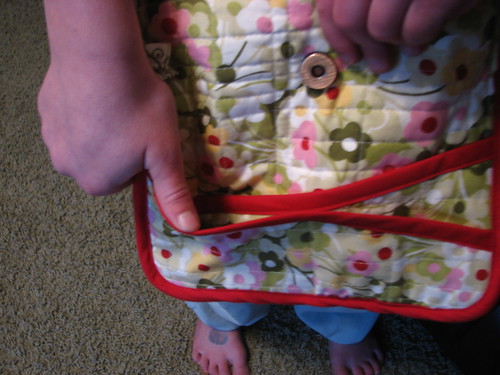
The trees are pockets! They hold whatever you want to put in them to count down the days till Christmas or whatever else you want to count down to. You could put in candy or presents or a card with the carol you want to sing that night or whatever. We are putting our Jesus pictures in ours.

There are 12 trees with two pockets on each, so 24 days total. We will count down from the 1st to Christmas Eve by turning over a picture of Jesus each day.

Here is what ours looks like so far..with three pictures turned over and the rest still backwards.

IMG_8047

IMG_8050

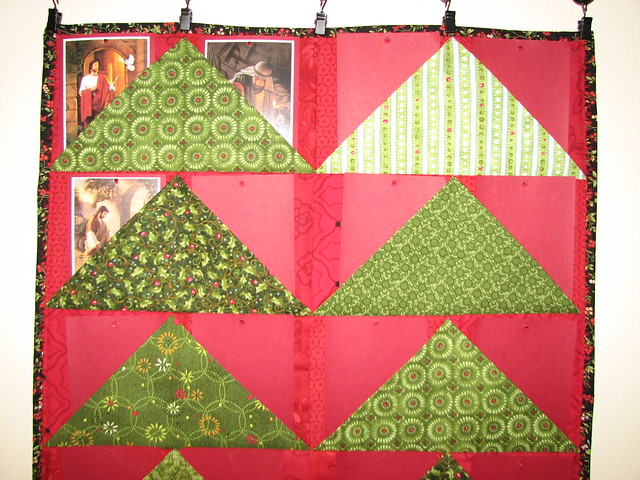
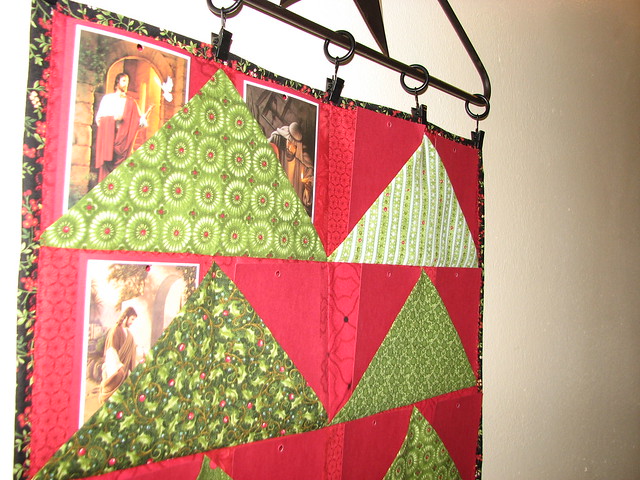
Get it? Brilliant, yes?

Okay, so here are the sewing directions in my most completely non-technical, non-seamstress-y way.

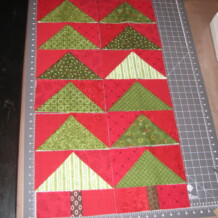
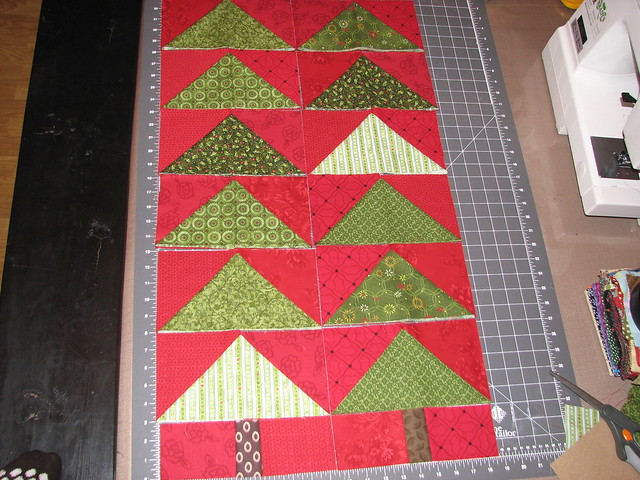
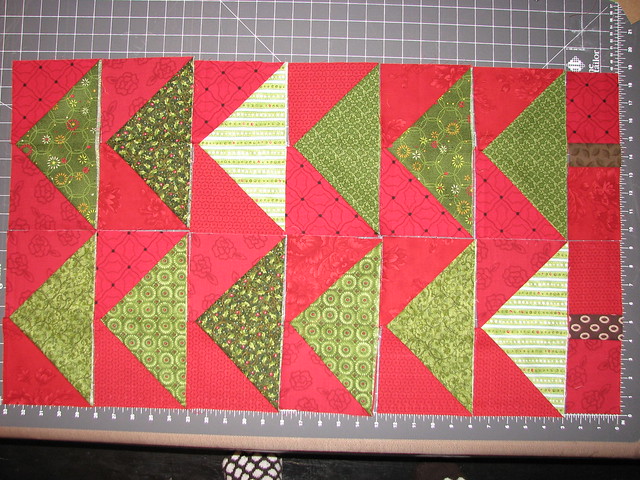
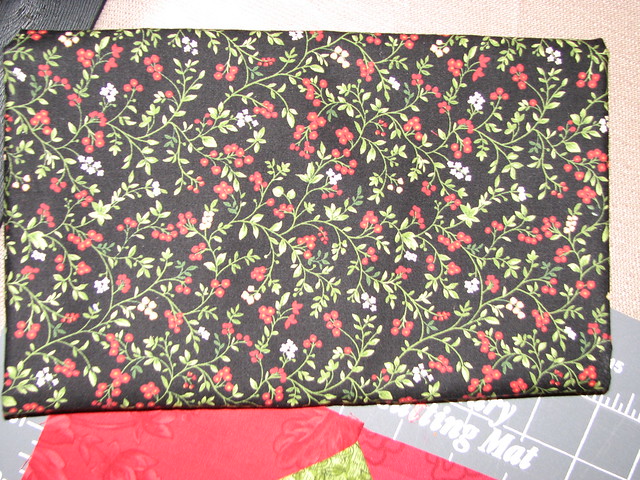
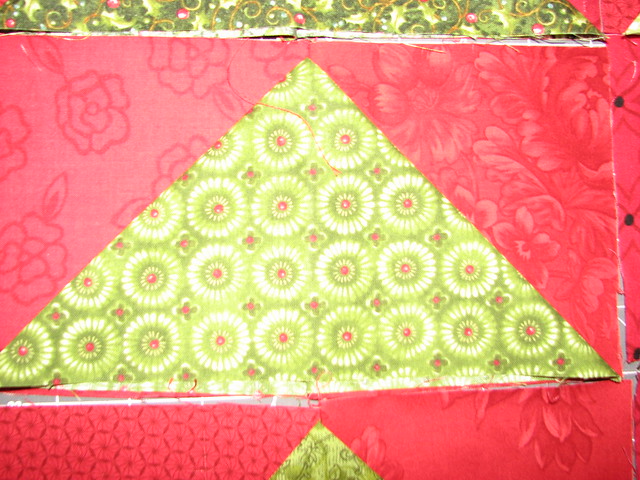
1. After you have made your flying geese pieces as instructed here, then you need to arrange all your pieces the way you want them to be.

2. Make sure your seams are pressed the opposite way from the piece on top of it.

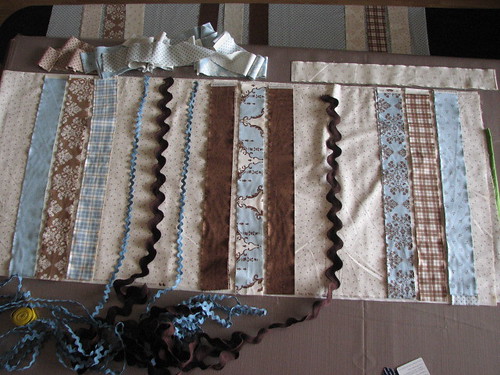
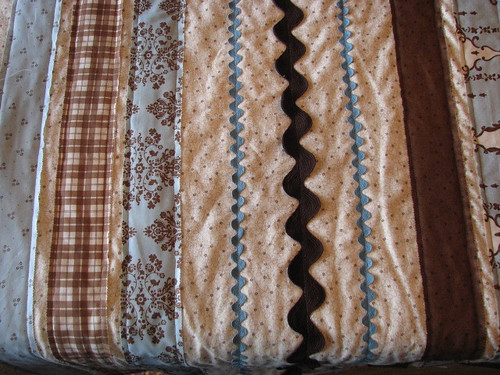
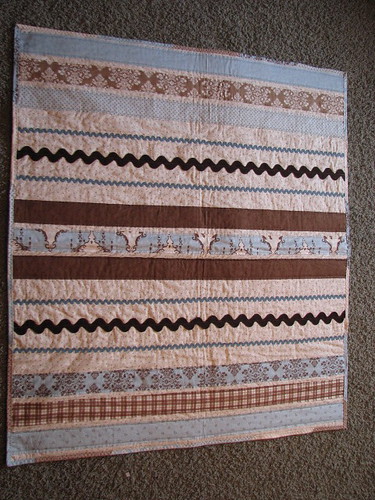
3. Sew your tree lines together to make two trees per row (or two trunks for the bottom piece).

4. At this point you need to get your back ready. My front measured 18″ x 29.5ish”, so we cut the back 20″ x 32″ and cut the batting the same.

5. Iron your batting onto the wrong side of your backing. They will kind of adhere to one another…Kat calls this hugging.

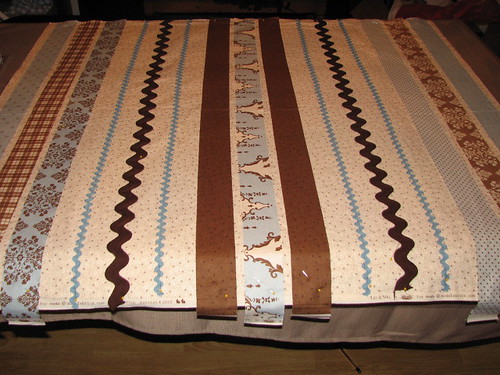
6. Then lay your top tree line near the top of your batting…give yourself a little bit of room…like 1/2″ or so.

7. Lay your next tree line below it and then fold it up onto the top tree line so right sides are together and your center seam is lined up. Pin and sew through all layers with a 1/4″ seam. This will quilt your fabric together while you are sewing it. I think it is called quilt-as-you-go method???

8. Press flat, then fold down and press seam open.

9. Lay the third treeline under the second and repeat steps 7 and 8.

10. Lay the fourth treeline under the third and repeat steps 7 and 8.

11. Keep repeating until you have done all six rows of trees and the trunk line.

12. Shout hallelujah and praise the Lord that you have finished the top!

13. Trim the excess batting and backing so all your edges are even.

14. Get your binding fabric ready by either using bias tape or making your own binding fabric by cutting fabric and sewing strips together. I cannot describe this process to you…just google it and I’m sure you will find some directions that will make more sense to you than anything I could say.

15. I pressed my binding fabric in half and then lined up the raw edge with the edge of my top and sewed a 1/4″ seam all the way around. At each corner, sew until you get 1/4″ from the corner, then fold in the fabric to make a 45 degree angle on the corner and fold the top to make a 90 degree angle that lines up with your new side you will be sewing down. Okay, that didn’t make a lick of sense…just google it and once again, I’m sure you will find some awesome directions. Here are some I found: Sew Inspired and Oh Frannson. Both of those however sew the back on by hand, which I would never in a million years be able to do…if you can believe it, my hand sewing is even worse than my machine sewing – I have NO fine-motor coordination.

16. Clip your corners…just a little bit to remove excess fabric.

17. Press your binding seam on the top of your quilt and then turn it over and fold the binding to the back, pressing as you go. Make your mitered corners have balanced, attractive 45 degree angles and press into place.

18. Choose a stitch that is wavy so that it will be able to catch both the front and back pieces of binding in the same stitch. I used a vine stitch that turned out quite lovely. This type of stitch is very forgiving and allows you to mess up without a disaster resulting. Start sewing somewhere other than a corner and when you get to the corner, make sure your mitered corner looks good and sew into it a little bit to make sure you catch all the edges. Continue sewing around till you are done.

19. Fall to your knees with gratitude that you are FINISHED!

I have probably missed some steps, but that is what I can remember right now. Kat? Do I need to add anything else?

For those of you that can sew, this would be an easy-peasy project. For me, it took a whole-lotta effort.

read more

Related Posts

advent dreams

Dec 3, 2011 by

advent dreams

I have longed for an adorable advent calendar for years. Decades. On top of that dream, I added the cherry of wanting to be the one to actually make it. I have scoured the internet for the last many years looking for one I loved AND could make.

I have found a few, but they have never materialized. I have tried making a few, but they never turned out. A few years ago I bought a set of pictures of Jesus in a mini-size and mounted them on cardstock and hung those up with clothespins on a piece of rick-rack. It drove me batty. I loved the idea, but it turned out so much different than I had envisioned that it was hard for me to even enjoy it. The pictures didn’t hang straight and any breeze through the house would send them all twisty-turvy. It was hard to tell which ones had been turned front-facing and which ones were backwards because they were always so skewampus.

This year I decided I would try once again to make one. Myself. By the grace of God…literally…and the help of my sewing mentor and dear friend, Katherine, I did it!

We started the project a couple of weeks ago and made it this far. Then Thanksgiving and the gnome party happened, so no progress was made. All of a sudden it was December 1st and I needed it to be done. Kat said I could come over and she would help me. Thinking it would take four or five hours I set out in the early afternoon hoping to be home in time for a late dinner with my family. What was I thinking? I didn’t leave Kat’s house until 1 a.m.! (Then I had to be up at 6 a.m. to get my family ready to go teach gymnastics all day.) Craziness!

Sewing the top together was fairly easy, but a little frustrating. The first two rows went smoothly, but I think we unpicked the third row (or was it the fourth?) several times. I was ready to scream at this point. The stupid, simple, straight seams were taking far longer than they should have because my skills are so, SO lacking. Kat could have whipped it out in no time at all, but she insisted I sew every stitch. I’m glad she did, but at the time I was none too thrilled. As the hours wore on, I just wanted to hand the whole thing over and yell “let me throw some money at you and have you finish it!” But she wouldn’t let me give up.

After the top was finally finished, we started the binding. Binding! Can you believe it? She made me do the binding! Never in my wildest imaginations did I think she would make me do the binding. Binding is a separate thing. A thing for experts.

She taught me what to do and because I had paid close attention when Jessica sewed my binding on the quilt I made for Natasha this spring, her directions made a teensy bit of sense. I sewed all the binding fabric together, then pressed it in half and then quite trepidatiously started sewing it on. I thought to myself (prematurely!) “This isn’t bad at all. I can do this! Look at me. I am sewing binding on. I really should start saving $20 a month for a better machine, I could never do this on my machine, but if I had a machine that worked like this one (I was sewing on Kat’s), I could do this. I am figuring this out. I can do this.” After the first side of binding was sewn on, Kat taught me to clip the corners, press the binding to the back side, and make lovely mitered corners.

This is where the real trouble began. I thought I followed her directions exactly. I thought I knew what I was doing, but I didn’t. I clipped holes in the corners. HOLES! Holes in my almost finished, just-spent-the-last-11-hours-sewing-and-unpicking-and-sewing-and-unpicking-and-sewing project. (Not to mention the hours I spent picking out the fabric, cutting it out and sewing all the trees together a few weeks ago. Not to mention the years I have dreamed of hanging up my very own homemade-by-me calendar.)

It was too much.

I burst into tears. Gut-wrenching sobs. I buried my face in my hands and started spouting off some nonsense about how this is what always happens…I ruin my sewing projects. What was I thinking? Why on God’s green earth did I think I could do this. Why didn’t YOU (meaning Kat) stop me months ago when I started talking about this? I will never, ever sew another stitch. I will never get some insane idea about creating ANYTHING. I am going home. You can have my fabric if you want it. You can burn it or whatever you want, but I am going home. I never want to see it again. No, No, you cannot make me open my eyes. I am leaving. Yes, I am giving up. Why? Because I can’t do it. It’s just too hard and I am not good enough to make it turn out the way I want it, so I am leaving.

Yes, I said all those things. With snot running down my face and tears pouring out of my eyes and sobs wracking my body.

And Kat? She listened and she cried and she grabbed my face in both of her hands and she said “NO! You are doing this. We will fix it. It will be lovely. You will see. Trust me. Trust me. Trust me.” She was amazing. She loved me right through years of fears and heartbreak and unrealized dreams.

She also said I should pat myself on the back for not being scared to use my scissors…I guess some people are so hesitant to cut that they don’t get their corners trimmed down enough. Yeah, I think I will be one of those people next time (will there ever be a next time?) because I don’t ever want to see holes in my almost finished project again.

After I calmed down and wiped all the snot off my face, she showed me how to fix it and by show I mean she basically did everything but push the pedal and guide it through. She made me do those two things, but really I had NO CLUE what I was doing.

Then I pressed the binding to the back, made my mitered corners (which turned out a gazillion times better than I ever imagined they could) and sat down to sew it on.

Can I just say sheer terror. The last step and it felt like everything was on the line. It felt like I was going to ruin my project one step from the finish line.

But I didn’t. It worked. I worked. Kat sat and watched and we had a wonderful gospel discussion about covenants and God’s promises and faith and motherhood and we both cried some more. But not because of sewing. Because of God’s love for us.

Here it is…I still can’t believe it.

IMG_8029

Thank you Miss Katherine. You saved my dream and brought it to life. I cannot thank you enough for walking through the path of fear with me. Maybe someday, if you hold my hand for long enough, I will conquer it.

read more

Related Posts

making my very own advent calendar

Nov 22, 2011 by

making my very own advent calendar

Oh my.

I cannot even tell you how long I have wanted…yearned for…a homemade advent calendar. I have been searching for one that speaks to my soul for years. I have fallen in love with a few, but haven’t had the skills to make them. It seems like I spend every fall searching for the one I will not only love, but will also be able to make.

Ladies and gentleman (do we have any gentlemen here?), I have found it!

Okay, I didn’t actually find it. Jennifer and Kat found it on their weekend sewing retreat (How fun is that? Two best friends spending a weekend in a cabin all by themselves sewing up a storm, eating yummy food, and shopping at fabric stores!) and came back and told me all about it. Then, Kat told me exactly what to do, and so far, so good. We are halfway done and it is looking adorable!

Here is the top all laid out and ready to sew…except, I will be rearranging them still. The red and black fabric with the dots need to be spread out from each other. The trees and trunk are already sewn on to the red background, but now each piece needs to be sewn together. The trees are not sewn down on the angled sides, they are pockets that you use to put whatever stuff you want your advent calendar to hold. Ours will hold our Jesus pictures. We will put them in backwards and then each night during our Christmas devotional we will turn the picture for that day over. Make sense?

IMG_7911

IMG_7912

This is the back and binding fabric. I am swooning over it…and if I wasn’t sitting here with bedhead and in my jammies, I would show you my swooniness (and no, that isn’t actually a word, but I kind of like it).

IMG_7913

A close-up of a tree so you can see what I mean about the pockets.

IMG_7914

I keep thinking I will write up a step-by-step tutorial, but I can’t promise anything…and my non-technical instructions might not make sense to anyone anyway. But, for now…if you don’t know how to make a one-seam flying goose, which is what I did to make my trees, watch this YouTube instructional video to find out how.

If you can’t wait for the tutorial and you think you can figure it out on your own, here are my dimensions for the fabric pieces.

Cut green pieces 9 1/2″ x 5″. Cut however many days you want to do, divided by two since each green piece will make two pockets for two days. I cut 12, so I will have a 24 day calendar, December 1 – Christmas Eve. I used fat quarters and you could get by with 2 fat quarters to get all 12 of your pieces, but I wanted mine to have a lot of variety so I used 6 different fat quarters and have a lot left over to make two more calendars as gifts.

Cut red pieces 5″ square. For my 24 day calendar, I need 24 red pieces. Again, I wanted variety, so I used 4 different fabrics. You could get by with 2 fat quarters.

Cut 4 more red pieces 3″ x 4 1/4″ for the pieces by the trunk.

Cut 2 brown pieces 2″ x 3″.

Then make your sandwiches as outlined in that awesome YouTube video and sew your trees together, press them open and lay them out the way you want them.

That is as far as I have gotten so far, but when my sewing guru, Miss Kat, comes back to teach me how to do the back, I will share the rest with you.

read more

Related Posts

keziah’s new bag

Aug 23, 2011 by

keziah’s new bag

Keziah bought a bag pattern about a year ago and ever since then she has desperately wanted to create the bag. Clear back in February or March she bought her fabric and then came right home and started working on it. She got a few pieces cut out and then asked me for help. The problem was that for me reading a pattern is like reading Mandarin. It simply makes no sense to my brain at all. She kept trying to work on it here and there, but had little success because I couldn’t help her. She would call our dear friend, Kat, and get input on what to do next, do it, and then be stuck again. It was really frustrating for her, but she kept working on it a little bit at a time.

Last week she worked out a deal with Kat…she wanted Kat to come over and help her and in return she would babysit for her or do something else needed and wanted. Kat agreed and yesterday she spent about 12 hours at our home guiding Keziah through the whole process. Kez did all the sewing, but Kat did all the pattern interpretation which I fail so miserably at. Kat and I talked and laughed and ate and every few minutes Keziah would come out and report what she had done and ask what to do next. I was able to clean the mountains of precariously perched papers, books, and minutia off my desk while Kat worked on the internet, and all of our little children collected loads of bugs and went on grand adventures outside.

Well, at about midnight last night, Keziah finished the last step! It turned out adorable! I am so proud of her for sewing for twelve hours straight and sticking with it even she was frustrated with her lack of perfection. I’m proud of her for making tough decisions about how to improvise when she ran out of fabric halfway through. I’m proud of her for not screaming at her machine when it kept going berserk. I’m proud of her for not allowing my ineptness to stop her from making her bag.

Thanks Kat! It was wonderful to spend the day with you and yours, share our food and conversation with you, and see our little ones so happy to be together once again. You are a gem!

Here is the finished product…pretty cute, eh?

IMG_7517

IMG_7514

read more

Related Posts

my first sundress

Apr 10, 2011 by

I think this may very well be the first piece of clothing I have made for anyone all by myself. If not, it is DEFINITELY the first piece of clothing that is wearable. So wearable that Keziah wore it to church today! Woo-hoo for me!!!!

Granted, most of the work was already done on this pre-smocked yardage and all I had to do was cut the fabric, sew a seam, make the straps, sew them on, and hem it, but just those so-called simple tasks were nearly enough to do me in. As soon as I started cutting, I nearly gave up because my cutting skills are severely lacking and somehow I cut big gashes out of the fabric due to the volume of the skirt part folding over on itself…luckily you can’t even tell now. Pinning the two sides together was a frustrating task due to the poor cutting, but working together, Keziah and I got it to work. I created my own plan for the straps and they turned out quite well. I tried to sew them onto the top smocking lines, but I missed on three of the seams. I figured it out by the last one. I am super proud of the hem – it is quite straight!

Keziah loves the end result and I am happy as can be that she spent $9.50 on fabric and actually has a dress she can wear!

IMG_6714

Let’s hear a collective “Hurrah!” for me!

read more

Related Posts

a quilt for natasha & jacob

Mar 29, 2011 by

Many of you read about Daniel passing away last week and the heartbreak all of us involved have felt. Daniel’s funeral on Saturday was incredibly moving. His extended family flew and drove in from all over the country to grieve together and to support Jacob and Natasha in the burial of their first and only child. The gathering of Jacob’s parents and siblings had a profound effect on me. It showed me what family can be. It showed me a picture of what I am trying to create in my own home. The closing prayer at the funeral was especially touching. Jacob’s brother, Nathan, pleaded with God above to comfort all the mothers who have lost a child or had to deal with an injured child. I sat in my pew and sobbed. Most of the time I am at peace with my ten children who haven’t made it into my arms, but Nathan’s words brought up all the pain again. After I was done sobbing for myself, I sobbed for all of the children and mothers and fathers who have been separated by death. I sat and cried for quite a while and let all of those emotions come out.

This life is not for the faint of heart. The grief we feel can be overwhelming at times. I want to take all the grief away, but I cannot, for it is part of God’s plan and it is essential that we experience the grief in order to know the joy.

I am grateful I have had the opportunity to share this difficult time with my friends. I can’t imagine what they are feeling, but I know their hearts are heavy.

I felt a compelling desire to make them something tangible that they could hold onto when they can’t hold on to their son’s body. Even though sewing is such a challenge for me, I decided to make them a quilt. An easy quilt mind you, but a quilt none the less. I’m sure it took me five times longer than it would have taken a competent person, but maybe the hours I spent on it and all the uneven stitches will show just how much love I put into it.

Designing it:

IMG_6651

Here it is all laid out, ready to sew:

IMG_6654

After this point, my machine went into crazy, thread-skipping convulsions and I spent hours trying to fix it, sewing, unpicking, sewing, unpicking, screaming, and then finally giving up and using Blythe’s machine that only knows how to sew at sloth-speed or racehorse-speed. Whenever I sew on it, I feel like I am riding a bucking horse and my end results show it.

Hours later it was finally done, crooked and unevenly-spaced seams and lots of love all thrown together to make an adorable creation.

Here it is sewn and ready for binding:

IMG_6663

I have never made a quilt and certainly have never bound a thing in my life, so I didn’t quite know what I was doing. I watched some YouTube movies, read scores of directions, and was still terrified of completely ruining it. Then, last night at about 1 a.m. Jessica emailed me and said if I cleaned her kitchen she would do my binding for me. Of course, I hopped right in the car to go scrub down her kitchen and see a lovely binding quickly put into place. She showed exactly what to do so I can do it on my own next time, but I think that may be next to impossible.

Bound and ready to be washed so it fluffs up and frays:

IMG_6668

IMG_6667

IMG_6666

Now I just need to trim all the threads that went crazy in the wash.

IMG_6683

Jessica is simply amazing. Her finishing skills were just what was needed to make this quilt adorable. Thank you, dear friend! I will clean your kitchen anytime you want to sew something fabulous for me.

I hope Natasha and Jacob love it and that this small gift of love helps heal their broken hearts.

read more

Related Posts

cutie-patootie purse

Mar 14, 2011 by

I have had the Sherpani Zenia shoulder wallet purse for the past two years. To say this purse changed my life is absolutely true and quite possibly an understatement. I don’t know if you can grasp what a difference this purse has made in my life. I am not a purse person. I am not a haul-everything-around-with-me-all-the-time person. I have had a clutch wallet of various sizes and styles for years and because it was not attached to me, I would lose it.

Frequently.

Once Kat found it at Smith’s. I have left it at Winco numerous times. How is a person supposed to bag their groceries while holding a clutch in their armpit, especially when you have a child attached to you in a sling? Good thing I carry my babies in slings, eh? I might have lost one of them over the years! I can’t even tell you the amount of time I have lost in my life searching for my clutch wallets. Richard gets seriously worried about me losing all of our IMPORTANT CARDS and freaks out every time this happens. Me, not so much. A thief wouldn’t be able to pull much out of our account! My library card though…that one is too important to lose. So, I started my search for a solution and found it in the Sherpani Zenia. I have LOVED this small, life-changing device. It is the perfect size. It holds my cards, my cash, and a pen. It is attached to me at all times when I am out of my home. It has a spare key for our vehicle in it and because it is attached to me, I have been able to save us a small fortune in locksmithing fees. It is small enough that I am forced to throw away receipts on a regular basis, which is good for the soul. No point in carrying around receipts from 2003! The only drawback to the Zenia is there is no place for my phone. I can fit it on the inside, if there is nothing else in there, but that is not realistic, so I have had to carry my phone in my pants pocket or hand when I have no pocket. This had led to more than a few times of losing my phone. I have dealt with this problem, but have really wished I had a cell phone pocket.

The Zenia…aahhh, I loved it.

Then it broke. Not the whole thing, just the zipper pull, which makes it difficult to open and nearly impossible for my non-dextrous fingers to close (thank goodness for Keziah, it has been her job for months to close my purse for me!) It has a lifetime replacement warranty, so for the last 9 months I have just needed to mail it in and Sherpani will either repair it or replace it. Sounds simple, right? It would be, except for the fact that I cannot live without this life-changing device. I intended to mail it in last year on our way to our two week camping trip. I figured I could live without it in the mountains. Somehow I forgot about my plan until I was in the mountains and didn’t want to drive out of the mountains to mail it in, so now I have ended up living with the broken zipper for months and months.

I decided I would buy a new purse, but nothing spoke to me. I didn’t love the new Zenia colors and I didn’t really want to buy a new one when I will be given a new one if I mail in my old one, so I have been searching for something to replace it with. If you know me at all, you know that my personal possessions must speak to my soul. They can’t just be things with no connection to me. The color, the feel, the fabric…all of it has to MEAN something to me. Nothing could be found.

Then in January, I found a purse pattern at a local fabric store and fell in love. I knew this was the one. I quickly enlisted Kat into the project since I have no skills to actually produce the adorable thing. She agreed that we would do it in the next few weeks. I started scouting for fabric and finally found something that spoke to me. It has several shades of green, which is one of my current love-you-so-much colors. Green is my color for growth, for becoming, for sprouting forth in ways God wants me to sprout. It also has red…I have always loved red. Red looks good on me, it is vibrant, it represents life and life-sustaining activities to me. It also has pink. I haven’t always loved pink, but my little Annesley looks so good in pink that over the past three years, I have fallen in love with pink. Pink is also Kat’s favorite color and every time I see pink, I am reminded of my dear friend, Miss Katherine.

Katherine looked at the purse and then came to my house and made, yes, MADE a pattern for it, with a few modifications to make it smaller, more functional, and with a better use of the zippered pocket. My part of the deal was keeping all of the children happy and feeding Kat delicious food. I made delicious fajitas (twice), scrambled eggs, smoothies, and, of course, we had ice cream as well. I think I kept my part of the bargain, but I still need to do something fabulous for her. We started working on it on Thursday afternoon. Then we worked on it again on Friday after gymnastics and continued through the night until three a.m. On Saturday, we were up and working on it by about 8 a.m. and finished around 3:30. LONG project. I think the next one (Kat’s) should go much quicker! Stipling was a huge stress for us, so we emailed Jessica at 1:30 a.m. and she said we could come over and consult with her…right then, in the middle of the night. While Jessica and Kat figured out a stipling solution, I deep-cleaned her bathroom. Fair trade, eh?

I am in awe of Kat’s amazingness. My new purse holds all my debit cards, discount cards, membership cards, and of course, all five of our library cards, has a zippered pocket so no cash or critical receipt can escape, will hold my cell phone securely, and looks oh, so adorable! I am SO thrilled with this new little number.

IMG_6643

IMG_6645

IMG_6646

IMG_6647

IMG_6648

Pretty stinkin’ adorable, eh??

And now, I can mail in my Zenia!

read more

Related Posts

keziah’s pillow

Oct 30, 2010 by

Courtney, Keziah’s friend, had a birthday this week and Kez was determined to finish this pillow she started at least six months ago. She finally did it and Courtney loved it.

Their were moments during the process that Kez was so frustrated I was afraid she would never touch a sewing machine again, especially my somewhat temperamental machine (or perhaps my machine is just fine and we are all inept). I am proud of her for persevering and that her love for her friend fueled her determination to stick with it through many unpickings and resewings.

IMG_6095

IMG_6097

read more

Related Posts

joy pillow give-away

Feb 17, 2010 by

Dear readers,

My children are participating in the First Annual Idaho Homeschool Read-A-Thon and are reading to earn money to buy Usborne books for themselves and for F.A.I.T.H. – Families in Transitional Housing. They have been reading non-stop for the last 10 days and have been trying to find sponsors for themselves. I hatched up an idea to do a give-away to help them raise funds.

I made a pillow…yes, me the sewing impaired mama made a very cute pillow to give to some lucky soul!

Joy pillowBack of pillow

Isn’t that cute!

If you post about this on your blog and link back to this post and then leave me a comment with your website’s post, you will get one entry for this adorable 8 1/2″ square pillow. For every dollar that you paypal to the read-a-thon, you will earn two entries. All entries must be in by Saturday night at midnight and the winner will be announced Monday morning. Let’s spread this far and wide! Just think, if 1000 people donated $1, they would reach their goal of $1000. Let’s help them do it!

To paypal, my account is mom2bmw@aol.com.

If you prefer to mail a check, email me and I will send you our home address.

Thanks much! My little ones are having great time reading and earning books and are so excited to give books to the children at F.A.I.T.H. – Families in Transitional Housing.

read more

Related Posts

kat

Dec 22, 2009 by

Kat is a miracle worker! Late last night she came up with a plan to save my project for my children. Actually, she and Keziah came up with it. Around midnight.

If you are wondering why Keziah had any part in this, it is because she and I are partners, co-conspirators really, on this gift. We are making deluxe pencil & notebook holders. Keziah is doing the notebooks and I am doing the holder.

Now, you are probably wondering what went wrong yesterday for me to fall apart in frustration. I will explain.

They were finished…they were beautiful. I was so stinkin’ proud of myself. Then, I put the pencils in and ARRRRRGGGGGHHHHHHH came out of my mouth. The pencil pockets shrunk in one and a half inches and became a gathered, puffy, will-not-lay-flat, will-not-cover-the-notebook disaster.

Kat came up with several possible solutions and then we decided to basically start over with a whole new design…not encouraging given the fact that I am a sllllloooooowwwwwww seamstress, prone to making lots of mistakes and using my thread picker on an all too regular basis.

Finally, Keziah said, “why don’t we just make the notebooks smaller?” To which I replied, “what good will that do, it does not eliminate the puffy, gathered ugliness on the pencil side!”

But, that little comment of Keziah’s sent Kat’s brain into a whole new direction and she quickly spewed forth her new idea that would save everything. When she saw the look of utter incomprehension on my face she went back and explained it slowly and carefully as if I were five-years-old.

It helped. Maybe that is what I need… a sewing teacher that will treat me like I am five.

Now, I just need to carry out the revisions. I am dedicating several hours to this project this morning. Wish me luck. Actually I need more than luck, I need a little sewing angel to sit on my shoulder and guide me each step of the way.

Good thing Kat is just a phone call away.

Everyone needs a Kat.

Thank you friend – you are a gift to my life.

read more

Related Posts

aaarrrrrgghhhhh!

Dec 21, 2009 by

Just when I thought my sewing project was almost done and was pretty much fabulous, I discovered a serious error. I have made a mistake in designing my pattern and the results are atrocious! I will need one of my amazing friends to come to my rescue and show me how to salvage this project…Kat? Jennifer? Jessica? Anyone?????????

Yes, I know this isn’t the point of Christmas, nor is it the end of the world…but it is FRUSTRATING! I have looked forward to making these for my children for several years…and now they just aren’t working at all!

read more

Related Posts

sewing all day long and not much to show for it

Dec 19, 2009 by

Why do I do this to myself? Why do I dream of creating adorable things for my children and not budget enough time for the inevitable mistakes, unpicking and interruptions that happen while I am sewing? Surely this type of stuff happens to all who sew, right?

Two down, two to go. When they are all finished I will take a picture and share with you what I have designed AND made for my children. I tell ya, I am getting more ambitious all the time!

read more

Related Posts

pencil rolls on their way!

Dec 1, 2009 by

Hallelujah! The pencil roll project has been a huge success! The pencil rolls have been coming in all month long, but the last few days have been the jackpot with 70 coming in on Sunday, 132 coming in on Monday, and 66 coming in today! Simply amazing!

The families that have participated in this project have given their time, money, materials, and hearts to the children of Katie’s school. They have shown me what a small group of willing women can do…I tell you we can do anything! We can make a difference. We can work together. We can touch lives, soften hearts, and bring joy.

There are people involved in this project that I have never met, people that I know and see regularly, and people who live far away. We have volunteers from Idaho, Utah, Colorado, Wyoming, Alaska, and England! We have seamstresses of all ages, from girls under ten to grandmas over 70, and all abilities, from beginner all the way to professional. We have papas that watched babies so mamas could sew. We have people that donated fabric, sewed on buttons, delivered pencil rolls, and created patterns. We have a small army of volunteers who have taught me how to be give more selflessly. I counted up our volunteers and there are over 60 people who directly helped. One small blog, written by one mother in Idaho, has brought all of this goodness together to create something magical!

Here are some pics of the 516 (yes, we made it to 500!) pencil rolls:

Pencil Rolls 2

Pencil Rolls

IMG_2481

Look at this cute inside fabric! It is pencils! Isn’t that adorable? You can get it at Hancock Fabrics.Roll with pencil fabric

And here is one of my pencil rolls I did by my very own self. I truly am sewing challenged and I’m sure my rolls took me ten times longer than they would have taken someone who is not inept in this area, but I did it and did lots of them. It was a wonderful project for me to overcome my fear of sewing and I improved a lot by the time I was done. Thanks to my mom, I learned how to sew buttons on with my machine!!! Hoorah!My pencil roll

I just took them to the shipping office and after repacking them into one big box from my three boxes and then repacking them AGAIN into a slightly smaller box (It was quite the sight, to have me inside a huge box on the floor, surrounded by pencil rolls, as I loaded up stack after stack of them! Why so many repackings you ask? Well, my three boxes would have cost about $120 with FedEx and $160 with the USPS with UPS somewhere in the middle, so we tried to save moo-lah by repacking them into one box, which was then a tad too big, so we repacked again, and got the price all the way down to 90 buckaroos.) they are on their way to Tennessee and then on to Uganda!

Thank you to all of you. Thank you for your sacrifices, your love, and your generosity. I pray that you will be blessed. I ask that you join me in prayer that our gifts will make it to Uganda in safety and that they will bring happiness to the children of Katie’s school.

read more

Related Posts

pencil roll tutorial!

Oct 28, 2009 by

Drumroll please

:::::::::::::::::::::::::::::

(doesn’t that look like a drumroll?)

Here are the long-awaited directions for the pencil roll!

Go to Kat’s website and you will find step-by-step instructions for our 500 Pencil Roll Project for Katie’s children. After hours of brainstorming, reading other people’s tutorials, and basically making myself crazy, we created this easy, step-by-step guide that anyone (even me!) can follow. I am telling you, if I can sew these, truly, anyone can!

We are not doing them with the different colored pockets for each pencil – they are WAY cute, but also time consuming, and we are trying to make these as quick as possible. These ones are made with one piece of cotton fabric for the outside, a different piece for the inside, and flannel hidden on the inside to give it some strength, or you can use interfacing if you have that.

Each person can sew from cotton fabric they have on hand or if you are willing to purchase some that is great as well. If you are willing to donate money to the cause for others to buy fabric they don’t have, that is wonderful as well…or donate fabric!

I have about 20 yards of fabric I bought at Home Fabrics $1/yard sale, so if you need some, let me know.

If you want to do them with wool felt or a wool felt blend of 35% wool/65% rayon or 20% wool/80% rayon, you can and I will give you those directions below. DO NOT USE craft felt found in stores!!! It is garbage and will not hold up to even a week of handling. You can buy the wool felt at prairiepointjunction.com and get a 20% off coupon by entering here. The discount button is over on the right hand side of the page about 1/2 way down. You can also get it at Joann.com and use a 50% off coupon or 40% off coupon. The 20/80 blend is $7.99 and the 35/65 blend is $9.99, so with the coupons, it would be a great price! It is not available here in our local stores, but may be in the larger stores, just call and ask if you are interested. Caution though, if you do not know much about wool felt, call me before you purchase it so I can help you know if it is acrylic/polyester/eco-felt garbage or if it is the good stuff.

Now, you may be wondering why using wool felt is easier than using your leftover cotton scraps. If so, let me explain. Wool does not fray and does not need to be sewn right sides together/wrong sides out and then turned. You just sew right on to your piece of felt!

Wool felt tutorial:

Your finished product will be 10.5″ wide x 8″ tall.

Cut a piece of wool felt 11″ x 17″ and position it so the 11″ side is running side to side and the 17″ side is running top to bottom.

At the top, measure in 1.25″ and 5″ down the side and cut.

Fold up the bottom 4″ and pin in place.

Lay a thin no-damage ponytail holder on your table and hold it flat. Wrap a thread around it 1/2″ from its end.

Insert the 1/2″ side of the ponytail holder at the almost 4″ mark of your felt (where you folded up the bottom) and pin in place just below the top of that pocket. The big loop of ponytail holder should be hanging out of the fabric.

Top stitch at 1/4″ all the way around the wool felt, making sure to back stitch over the ponytail holder.

Measure and mark 7/8″ pockets on the part you folded up.

Sew pockets going a titch past the top of them so the stress point isn’t right at the top of the pocket and back stitch at both ends.

At the spot where the flap starts, fold it down and top stitch at 1/8″.

Put some tester pencils in and roll it up so you can figure out button placement for where the ponytail holder will attach. Mark where a button should go. Unroll, take your tester pencils out. and sew a big button in place.

If you want to make it super-cute, use pinking shears to cut the edges, making sure to not cut through the elastic.

Voila! You are done…now isn’t that easy peasy!

You may choose to use two piece of wool felt to make it more colorful and add to its strength. If so, just do everything identical, except insert the ponytail holder in between the two pieces of felt.

These are some pictorial instructions, but they don’t have the “cut the flap at an angle” step, and they use a ribbon instead of the ponytail holder/button attachment. The ribbon attachment is easy for adults, but not so easy for little children to wrap it around and tie, so we are using the button method. It also doesn’t have the top stitching, so make sure you do that. As soon as I make one out of felt I will post pictures, but it will probably take me a day or two to get to that.tracy

Now you have everything you need to get to work. Thank you so much for your willingness to help and please, please, spread the word and enlist the women in your life to sew with you! Right now, we are at 21 women, so that means we each need to do 24 rolls to make it to 500. As word spreads, the per person roll can decrease…so step out on a limb and encourage others to sew with you.

Also, there has been some confusion about the pencils. Amazima has a lot of colored pencils and we do not need to provide those. We are doing the sewing and they are gathering the pencils.

If you have any questions, let me know at tracy@wetoatmealkisses.com.

read more

Related Posts

oompa loompa outfit

Sep 8, 2009 by

I really cannot sew. It hurts my brain. It tries my patience. It drives me batty. But for some ridiculous reason, I am drawn to sewing. I buy fabric. I buy patterns. I dream of creations. I long to be able to whip out something adorable for my children to wear. My dear friend, Kat, taught me how to make this outfit and then she insisted that I sew each and every stitch of it. She practically held my hand through the whole process and it took at least three times longer than she thought it would, but I did it! I think it is absolutely precious and I love, love, love it. It is super-wide, especially on Annesley who is the skinniest thing ever, and so we named it an Oompa-Loompa outfit.

Oompa-Loompa outfit

Isn’t it cute! Aren’t you so incredibly proud of me?!?

If you can’t tell from the picture, it is reversible and the bottom is supposed to be folded up so you can see the contrasting fabric, but, of course, I forgot to do that for the picture.

I have more fabric to whip up plod my way through some more, but I don’t know when I will get to it, as now I am thinking of making LOTS of colored pencil holders for the children in Uganda that attend Katie’s school. Anyone want to join me in making some of these?

Pencil Roll Another Pencil Roll
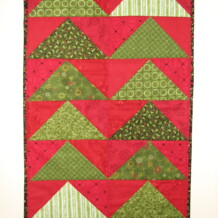
These are the beautiful creations of the super-talented and creative April of By Small Means. Notice how each pencil has color-coordinating fabric? Notice the handy flap to keep all the pencils from falling out? Notice how bright and colorful and adorable they are? Don’t you want to help us make hundreds??? If so, or if you would like to donate fabric, buttons, flannel, or $$ to buy this stuff, please put it in the comments section and I will get in contact with you and work out a plan.

read more

Related Posts