vegetable quinoa soup

Dec 12, 2023 by

Made this tonight! It’s super yummy! And packed with good nutrition! I didn’t have a parmesan rind – in fact, I’ve never had one – and it was still good without it, but I imagine it would be even better with it!

https://kaynutrition.com/vegetable-quinoa-soup/print/29643/?fbclid=IwAR060xcFjGWk_oxjYAS8Y3Fkv8OFnCEbghny5V6PTuehMx4uvXSRWpRhKCk

Ingredients:

  • 2 tablespoons olive oil
  • 1 onion, diced
  • 3 carrots, peeled and diced
  • 2 ribs celery, diced
  • 2 cloves garlic, minced
  • 1 teaspoon dried thyme
  • 1 teaspoon dried oregano
  • 1/4 teaspoon red pepper flakes (optional)
  • 1 teaspoon salt
  • 1 cup quinoa, raw
  • 1 can (14 oz.) white beans, strained and rinsed
  • 1 can (28 oz.) diced tomatoes
  • 4 cups vegetable broth
  • 2 cups water
  • 1 bay leaf
  • 1 parmesan rind
  • 2 cups spinach, roughly chopped

Instructions:

In a large pot on medium-high heat, warm the olive oil.

Add the onion, carrot, and celery and sauté for 3-4 minutes until tender. Then add the minced garlic and cook for an additional 1-2 minutes until tender.

Add the dried thyme, dried oregano, red pepper flakes, and salt, and sauté for an additional minute until fragrant.

Pour in the quinoa, white beans, and diced tomatoes and stir to combine with the vegetables.

Pour in the broth and water and stir again until everything is well incorporated.

Add the parmesan rind and bay leaf to the pot and stir to ensure they are submerged in the broth.

Bring the soup to a boil, then reduce to a simmer, and cook for 20 minutes, stirring occasionally, until the quinoa is tender.

Once cooked, add the chopped spinach, stir until well incorporated in the soup, and simmer for a final 5 minutes until the spinach is wilted. If you find the soup too thick, simply add some more water or broth to thin the soup to your liking.

Remove the parmesan rind and bay leaf, then taste the soup, and adjust the seasoning with additional salt and black pepper as needed.

Serve the soup immediately with freshly grated parmesan or allow it to cool completely and store it in the fridge for up to 5 days or in the freezer for up to 3 months.

Notes:

To Make it in a Slow Cooker: Add all of the ingredients to a slow cooker and cook on high for 2-3 hours or on low for 4-5 hours. Once cooked, remove the parmesan rind and bay leaf, then taste the soup and season with additional salt and pepper as needed.

To Use Cooked Quinoa: Add the quinoa as instructed in step #4, however, only simmer the soup for 5-10 minutes until heated through, then proceed with instructions as outlined.

To Use Frozen Spinach: Thaw 1/2 cup or 2 ounces of frozen spinach, press out any excess water, and add it to the soup as per step #8.

To Use Dried Onion and Garlic: Use 1 teaspoon of garlic powder and onion powder.

read more

Related Posts

egg roll in a bowl

Apr 25, 2019 by

I first made egg rolls in a bowl last year when Kat introduced the idea to me. Since then I have made them a few times in a few different ways, but haven’t really found my groove with it until tonight. Tonight we made it again and we all decided this version was the best yet. It comes from The Seasoned Mom and is a total winner.

    Egg Rolls in a Bowl

  • 2 lb. Ground Meat – we use Swaggerty’s Natural Sausage.
  • 2 C. Diced Onion
  • 2 TB. Toasted Sesame Oil
  • 2 TB. Rice Vinegar
  • Heaping TB. Minced Garlic – 4 tsp. if you want to be technical.
  • 2 tsp. Ginger Paste
  • 1/2 C. Bragg’s Liquid Aminos
  • 2 16 oz. Bags of Coleslaw Mix
  • 1 C. Shredded or Matchstick Carrots
  • 2 TB. Hoisin Sauce
  • 4 Sliced Green Onions
  • Salt and Pepper to Taste
  • Cook sausage or other ground meat. Drain. Return meat to skillet. Add onion, sesame oil, and rice vinegar to the skillet. Stir while cooking for a few minutes until onion is tender. Add garlic, ginger, Bragg’s, hoisin sauce, coleslaw mix, and carrots. Continue stirring while cooking for 5-7 minutes until cabbage is wilted. Remove from heat, stir in the green onions, and season with salt and pepper.

Oh my goodness, so yummy and super fast. I think we had it all done in 20-25 minutes. This one is going to become a staple.

read more

Related Posts

sweet & sour chicken

Jun 14, 2018 by

I used to make this meal all the time. Then when I was injured in 2012 and stopped cooking on an even less regular basis than I usually do, it was forgotten. But it was one of Blythe’s favorite meals and today I was thinking about her all grown up and decided to make it and see if my other kiddos liked it as well.

Sweet & Sour Chicken

  • 3-4 TB. oil (I use coconut)
  • 2 green peppers, diced
  • 6 green onions, thinly sliced
  • 2 C. pineapple tidbits with juice drained off and saved for later
  • 2 C. chicken broth
  • 4 TB. Bragg’s Amino Acids
  • 6 TB. vinegar
  • 1/2 C. honey
  • Pinch salt
  • 4 TB. cornstarch
  • 1/2 C. water
  • 2 C. cooked chicken, diced or shredded
  • 6-8 C. brown rice

Cook rice. Drain pineapple and save juice. In large skillet saute green pepper, green onion, and pineapple in hot oil for 3-4 minutes. Add pineapple juice, broth, Bragg’s, honey, and salt. Stir cornstarch into water, then add to pan. Cook and stir gently until thickened. Add chicken and heat through. Serve over hot rice. Serves 12.

I hope you like it! I think I’ll make another batch up and put it in the freezer to take on our next camping trip.

read more

Related Posts

kat’s lentil tacos

Nov 20, 2015 by

Miss Kat taught me how to make her delicious Lentil Tacos years ago. We love them ever so much for their easiness, deliciousness, healthiness, and low cost. Her website has disappeared from the interwebs, so I decided to post her recipe here so when people ask me for it, I have somewhere easy to send them.

Lentil Tacos

  • 1 Onion, chopped (if you have time to saute on the stove first, it’s worth it)
  • 2 1/2 C. Lentils
  • 5 C. Water
  • 2 tsp. Cumin
  • 1 tsp. Garlic Salt
  • 1/2 tsp. Pepper

Mix together in crockpot, cook at least 7 hours, 9 is even better on low or 3-4 hours on high. Or cook on the stove for about 30 minutes if you forgot to start it earlier in the day.

About 30 minutes before eating, add in:

  • 1 14.5 oz. Can Diced Tomatoes
  • 1 4 oz. Can Green Chilies

Right before eating, stir in 1 bunch of cilantro, chopped.
Serve on warm tortillas with these toppings:

  • Fresh Limes squeezed on top (a must!)
  • Sour Cream (optional, but delicious)
  • Grated Cheese (optional, but delicious)
  • Salsa (optional, but delicious)

My mom doesn’t like cilantro, so we leave it out when she is here and just let everyone put their cilantro on individually instead of mixing it into the big pot.

Thank you Katherine for blessing our family’s life with your fabulous foodie creations!

read more

Related Posts

stuffed potatoes

Nov 16, 2015 by

Something inside my mom-heart has woken up recently and I have been trying to prepare food for my family more frequently. I want my children to eat food I make for them, to feel my love for them in the food I feed them. Unfortunately this awakening has happened at the same time my wrist and forearm are terribly sore from my faceplant on October 30. So, we have some funny moments where I try to do things with my left hand and food flies across the kitchen. Or I spill things – yes, even more than usual – when I try to pour with my left hand. We have discovered it is basically just there to make me look normal as it is nearly non-functional for any cooking or writing activities.

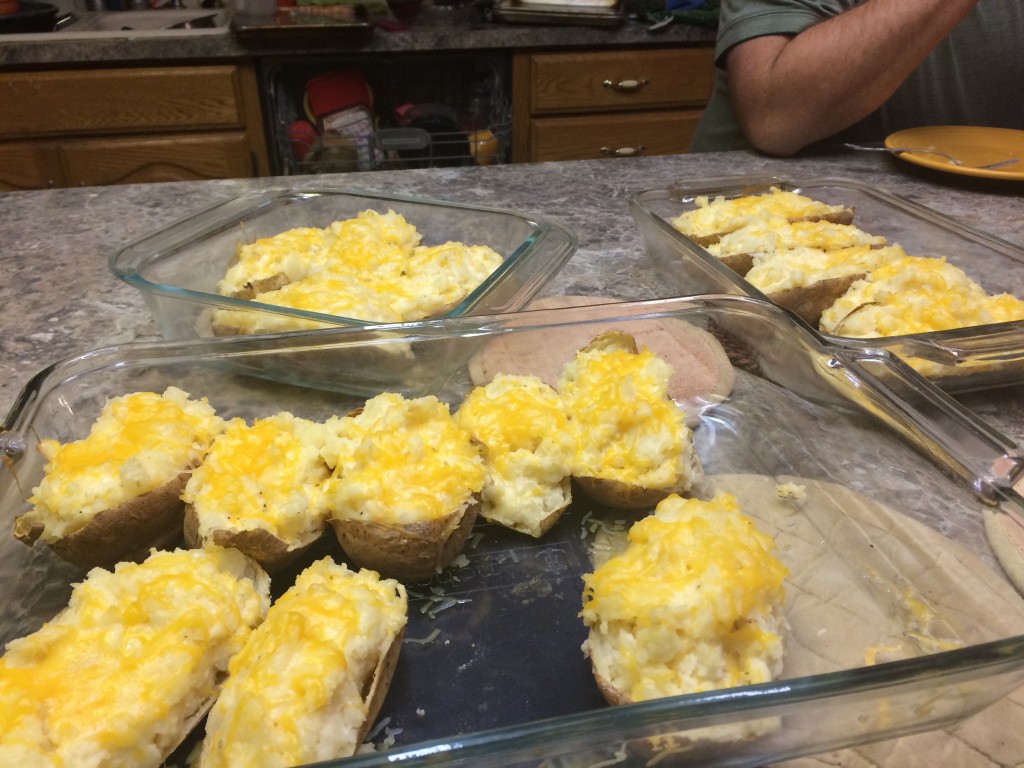
Tonight I made one of our favorite dishes from long, long ago when I used to cook everything from scratch and did so on a regular basis. When Annesley saw what was for dinner, she didn’t even remember eating these before so it must have been awhile ago when I was making these on a regular basis!

image

Stuffed Potatoes

  • 5 Large Baked Potatoes
  • 1 C. Plain Yogurt (can substitute sour cream)
  • 1 C. Shredded Cheddar Cheese
  • 3 T. Butter
  • 2 T. Milk
  • 2 T. Finely Minced Onion
  • 1/2 tsp. Salt
  • Dash of Pepper
  • 1/2 C. chopped cooked bacon (I’ve never put it in and it is super delicious without it.)

Slice potatoes in half lengthwise. Scoop out centers, reserving shells. Beat potatoes with yogurt cheese, butter, milk, onion, seasonings, and bacon. Stuff shells. Place on baking sheet. Bake at 400 degrees for 15 minutes. Garnish with paprika and/or parsley (although I have never put either one on).

From Whole Foods For The Whole Family by La Leche League International

My arm is done functioning for the night. Cutting and scooping out and stirring and scooping back in were super painful, but worth it for the squeals of delight from our kiddos and the smiles my sweetie gave me when he saw what I had made.

read more

Related Posts

yummy fried rice

Oct 20, 2015 by

Cooking is a challenge for me. My brain struggles with making sense of the whole thing…what is essential, what can be substituted, what is the dish missing, what flavors go together…all of that is a foreign language to me. Thank goodness I can call Kat and have her tell me how to rescue a meal. My kitchen skills are sorely lacking as well. Burning myself, cutting off hunks of skin, and dropping pans of food are pretty regular occurrences. My recent Facebook post illustrates my cooking situation.

I am trying to make dinner for my family a little more frequently than the not-ever-making it I have been doing. This is how it went tonight. 1. Lost the chicken broth lid under the fridge. 2. Turned off the stove long before the pasta was done cooking. 3. Turned on the stove when I noticed I had accidentally turned it off. Except I didn’t…when I went back to check it, it was still on OFF. 4. Dropped the vacuum on my ankle…the one that is having a really hard time staying in place. 5. Poured the spinach steaming water/juice all over the griddle, across the cabinet, and down the drawers where it finally made a puddle on the floor. 6. Lost over half of the pasta in the filthy sink when the colander tipped over. 7. Dropped the boiling hot pan still full of 1/8 of the pasta on my tile floor and scared one child half to death (didn’t break the tile though!) 8. Saved what pasta I could and poured the delicious spinach mixture all over the top. 9. Ate it with one silent child and one whiny child. So delightful. 10. Forgot about the water that must have spilled out of the pan and the whiny child slipped on it. 11. Ran out of food before husband got home from work to eat it. (since more than half of it got ruined in the filthy sink). 12. Now have to run children to Scouts, Young Women, pick up from Irish, get ready for iFamily and Primary Auxiliary Training tomorrow and have no time to make more food.

This is why I don’t cook. I have such high hopes and my skills don’t measure up. Pretty sure I could win $10K on America’s Funniest Home Videos if I just kept a video camera going in my kitchen at all times!

In spite of all that, I make really good fried rice. After trying for years to make my fried rice taste delicious, I found a recipe online that insisted on the importance of sesame oil. I had always used olive or coconut oil or NO oil in an effort to save money and surprise, surprise, it was pretty disgusting. Trust me, the sesame oil is essential. It is expensive, but it is essential! The original link of this recipe is dead in internet land or I would source it for you. I have changed it a little bit from the original, so now it is time to share this deliciousness with the world. This is exactly what I do and it feeds our family of six with enough leftovers for lunch the next day. I haven’t messed it up yet – it turns out fabulous every time!

Fried Rice

  • 9 TB Sesame Oil
  • 3 Small Onions or 2 Large Onions, chopped (I usually do 2 large onions…less peeling for me!)
  • 6 Cloves of Garlic, minced
  • 3 C. Peas and Carrots (frozen bags)
  • 6 Eggs, barely stirred, not whipped
  • 9 C. Cooked Brown Rice
  • Braggs Amino Acids (we use this in place of Soy Sauce)

Pour the sesame oil into a really big frying pan with high sides (I can use my 13″ frying pan, but I usually use my Tramontina 4 Qt. Braiser since the high sides hold the food in better.) and heat it up for a few minutes. Watch it so it doesn’t burn. Saute the onion and garlic and then add in the peas and carrot mixture. Scoot the vegetables to one side of the pan and try to get your oil to the other side of the pan and pour the eggs in on the oil side. Stir them gently until they are cooked. Add in the rice (carefully and slowly so it doesn’t spill all over the stove…there is a lot of it!). Pour the Braggs deliciousness all over it and carefully mix everything together. Add some more Braggs until it tastes as strong as you like it.

The original recipe called for chicken and it was fabulous, but I have only added that in once because it is delicious without it and I tend to be a meat hoarder, saving meat for those meals where it is absolutely necessary.

When I make it, I fill my rice cooker to the 10 C. setting (which makes 20+ cups) and use less than half for this dish. Then my children have leftover rice in the fridge for several days that they eat with milk, cinnamon, and honey.

read more

Related Posts

banana apple oatmeal smoothie

Nov 13, 2013 by

A few months back a friend brought me over this delicious smoothie and I forgot to ever post the recipe. I have never had a smoothie with grains in it and didn’t think I would like it, but boy, howdy, I LOVED it and I’ll bet you will too.

Banana Apple Oatmeal Smoothie

  • 1 C. Water
  • 1/4 C. Vanilla Yogurt (she used Greek…why would anyone use anything else? Greek is the best)
  • 1/2 Banana, peeled
  • 2 TBS. Uncooked Quick Oats
  • 1/2 Medium Apple
  • 1/4 C. Dried Cranberries
  • 1/8 Cinnamon, ground

Place all ingredients into blender and blend for at least 45 seconds or until desired consistency is reached.

Enjoy!

Thank you to Natalie for sharing your creation with me. I think I’ll have another one tomorrow!

read more

Related Posts

fall has arrived in my kitchen

Oct 29, 2013 by

You never know what will happen after getting out of a walking boot you have been in for months! Tonight I felt so good, I ventured into the Land of The Unseen, otherwise known as the kitchen and whipped out something delicious for my family! I was reading King Arthur with Fisher when I started thinking about the cans of pumpkin in the pantry and all the yummy fall treats we have been missing out on.

It has been so, so long since I have had a day without mega foot pain and/or mega hip pain and/or passing out. Today I had no foot pain AND no hip pain and no sign of passing out, so I decided right then and there it was high time to get on my feet and get to work.

So, I made two tried and tested favorites. My mother-in-laws Zucchini Soup and the Pumpkin Chocolate Cookies Kat helped me develop a few years ago.

We are swimming in yumminess tonight!

read more

Related Posts

on the search for a new pair of shoes

Oct 24, 2013 by

Yummo! Breakfast this morning is a parsley and pineapple smoothie along with some Standard Process Complete Powder. I have been craving it lately and it hits the spot every time. If you want to make it for yourself, follow these easy-peasy directions:

Pineapple Parsley Smoothie

  • 1/2 can of pineapple with 1/2 the juice or an equivalent amount of fresh pineapple.
  • 1 big handful of fresh parsley

Fill up your Vitamix/BlendTec/Blender with ice and cold water.

If you have SP Complete, add it in before the ice and water. It is wonderful without it, but I need extra nutrition right now, so I add it in.

Drink down the deliciousness.

On other health news, I am trying hard to drink 3 liters of water every day, consume large quantities of supplements, and eat plenty of red meat which my body is craving, craving, craving. I need to hire someone to get me an elk this year. My brother didn’t get his and I really need a freezer full of elk meat, so if you know someone that likes to hunt, but doesn’t need all the meat point me in their direction.

Update on my foot: I have been out of my boot for the past several days. Big wahoo for bone healing! Now the task is to find a shoe that will support my foot as it continues to heal and won’t injure my hip. This task has taken up much of my time this week and I am ready to shout my head off. It needs to be a very stiff shoe with lots of heel, midfoot, and forefoot support. The shoe needs to do the job of my ligaments. Yesterday I was told I will be in this shoe for six to twelve months. Then I will transition into a normal running/cross-training shoes for another period of many months. Then I will be able to get back in my Danskos and maybe, just maybe I will be able to wear Chacos again in about two years. In normal people this process takes six to twelve weeks. In someone with a connective tissue disorder it takes much, much longer. I was also told this very well may be the pattern of my life…broken foot bones, sixteen weeks in a boot, two years recovering. Because my ligaments are so lax, they are not providing necessary structural support to the bones. My goodness, I should take up stock in Ossur walking boots! It is pretty depressing to think of going through this whole broken foot thing again (and again?!?) The super sad news is I have to wear the super-supportive stiff shoe for many months and can’t wear cute shoes that match my outfits or style of clothes or anything. Church shoes are out the door, heavy-duty cross trainers with skirts is the new look. Oh my, the looks I am going to get.

Time to get up and moving on our school day. Wish me luck in finding my new shoes – it is a seemingly impossible task!

read more

Related Posts

Gorilla Poop

Jul 30, 2012 by

We are going camping soon and although I am running hobbling around trying to get packed, I also am intending on making Annesley’s Favorite Granola and some Gorilla Poop, which is also known as No Bake Carob Cookies.

The wonderful thing about this recipe is that healthy foods like sprouts can be snuck in so effectively, with little change in taste.

Gorilla Poop

  • ½ cup Butter
  • ½ cup Nut Butter (almond or peanut)
  • ½ cup Honey
  • ½ cup Carob
  • 3 cups Rolled Oats

In a bowl, cream together butter, nut butter, honey and carob. Stir in rolled oats. Add in any or all optional ingredients. Spread into pan and freeze or refrigerate until ready to eat.
Allow to thaw for about 5 minutes, so they can be cut. Makes 16 – 18 chunks.

Optional Ingredients:

  • ½ cup Shredded Coconut
  • ¼ cup Flax Seed Powder
  • ¼ cup Carob Chips (or chocolate chips until your family is converted – then sneak in the carob)
  • ¼-1 cup Sprouts (sunflower, sesame, wheat, buckwheat, pumpkin, etc.) Start small and add it in to taste.

If I get enough time, I may also make some of Jessica’s Raw Bars – they are SUPER yummy and I have been craving them ever since she gave me a bite on our last injection trip.

What are your favorite camping recipes?

read more

Related Posts

Kat’s Granola Bars

Jun 27, 2012 by

Kat’s Granola Bars

I hired Kat to make hundreds of these granola bars for me to sell at concessions back in February at Blythe’s play and to feed us when we weren’t at the play…because of course, I can’t cook during play week. They were a huge hit with my customers and everyone here loved them as well. If you are in the mood for some chewy, healthy goodness for your summer camping trips, you won’t go wrong with these!

read more

Related Posts

African Chicken Peanut Stew

May 26, 2012 by

I need to try this African Chicken Peanut Stew. Don’t you think it looks delish?

read more

Related Posts

kerry’s chicken gnocchi soup

Mar 25, 2012 by

So delish. I am in love with this soup. My friend, Kerry, made it for us a few days ago and I swear, I could eat it every day. I can’t wait till I can be up and working in my own kitchen so I can make it myself.

I wrote to Kerry while I was eating my first bowl to ask her for the recipe and here are her directions so you can make it for you and yours. Enjoy!

I used this recipe but changed a few things. I sautéed the carrots with the other vegtables, and I think I put more of all the vegetables than what the recipe calls for, but I didn’t measure. I added more chicken, because 1 cup seemed like a very small amount. I used cream instead of half and half. Anywho, it is pretty easy to make. I am glad you enjoyed it. By the way, I have only been able to find gnocchi in the Smiths pasta section. I buy the cheaper brand. Recipes to make your own gnocchi can be found on the internet, but I think they are a lot of work.
 
Love,
 
Kerry
 

Chicken Gnocchi Soup

  • 1 tablespoons extra virgin oil
  • 4 tablespoons butter
  • 4 tablespoons flour
  • 1 quart half and half
  •  

  • 1/2 cup celery, finely diced
  • 1 cup onion, finely diced
  • 2 minced garlic cloves
  •   

  • 2 14 ounce cans of chicken broth if you enjoy thick soup, use one can
  •  

  • 1 cup carrots, finely shredded
  • 1 cup chicken breasts, cooked and diced (you can use a rotisserie chicken)
  • 1 package gnocchi, cooked (you can find these in gourmet/pasta section of the grocery store – you may want to cut the gnocchi in half if it is large, or purchase the mini size if available)
  • 1 cup of fresh spinach coarsely chopped
  • 1/2 teaspoon salt
  • 1/2 teaspoon thyme
  • 1/2 teaspoon parsley
  • 1/4 teaspoon nutmeg (optional)

Instructions

Sauté the onion, celery, and garlic in the butter and olive oil over medium heat until the onion becomes translucent. Add the flour and make a roux. Let the butter and flour mixture cook for about a minute before adding 1 quart of half and half.

Cook gnocchi according to package directions.

Into the roux, add in the carrots and chicken. Once the mixture becomes thick, add the chicken broth. Once the mixture thickens again, add the cooked gnocchi, spinach, and seasoning; simmer until soup is heated through. Before serving season to taste by adding additional salt.

read more

Related Posts

chocolate yumminess

Jan 23, 2012 by

I love chocolate peanut-butter combinations.

Love them.

It is a small problem in my life.

When I was a teenager I would buy a case of Reese’s eggs at Easter time and eat them all.

Yes, all of them.

Well, supposedly this chocolate shake is yummy. I am counting on it. As soon as I feel like eating again I am going to make it. I’ve heard this is 180 calories of deliciousness.

Chocolate Peanut Butter Smoothie

  • 1/8 cup of oats (2 tablespoons)
  • 1 banana
  • 1/2 cup of plain almond milk
  • 1 tablespoon of peanut butter
  • 1 tablespoon of unsweetened cocoa
  • Ice
  • Blender it all together

Must buy me some cocoa today! Well, maybe tomorrow since I don’t feel like going out just yet. Not even for cocoa do I want to go out…and that is saying a lot!

read more

Related Posts

sourdough bread, oh yes you can

Nov 14, 2011 by

sourdough bread, oh yes you can

I have wanted to learn to make sourdough bread for years. Literally, years. About five years ago, Blythe wanted to start a bread company, so she and I learned to bake bread. Our friends, the Kendell family, taught us how and we became a pretty good little bread-baking team. We sold bread to our neighbors and friends and had a great time doing it. When I became pregnant with Annesley, I cut out a lot of the extras, and baking 16 loaves of bread a week was one of the first things to go. The whole time we were making our delicious whole wheat bread, I yearned to make a whole wheat sourdough, but I had heard it was difficult and always turned out brick-like, so I allowed myself to be overwhelmed by the whole process.

Around that same time, I organized a nutrition class with Kim Simmerman and she came up to our area and wowed us with her amazing ideas about food. This only strengthened my resolve to learn to make sourdough bread. Then, about three years ago, I bought her Granola to Green cookbook and promptly devoured it. Not really, but I did make most of the recipes in the book…except the sourdough. I read and re-read the instructions over and over again and still allowed myself to be intimidated.

And I haven’t baked bread since.

I didn’t want to bake bread that wasn’t sourdough and I just knew I could never figure out how to make sourdough, so I didn’t make anything at all.

Each week I would buy Harper’s Homemade Whole Wheat bread for $2.16 and think to myself, I can make this for cheaper…but this, THIS, is SO convenient and I am not using up my food storage of wheat and olive oil and honey, so it is worth it. See how justification works?

Fast forward to now.

Carol Jensen taught a sourdough class at Make It For Maggie and she graciously gave me a start! Nervously Scared out of my mind, I determined to not let her gift go to waste and I read and re-read her instructions. Then I read and re-read Kim’s instructions. Then I called Kat. Then I called Carol. Then I called Kat again. Then I read everything again.

And then I got to work.

And you know what? It worked.

My bread turned out delicious. By some miracle, it actually was light and fluffy and had just a twang of sour. It was perfect.

I figured it was a miracle and would not be repeated.

But you know what? The next week I made more bread and it turned out pretty good.

And now it is Monday and my third batch of whole wheat sourdough is rising right this minute.

I think it is time to share the recipe with all of you so you can jump in and get to work without all the fear and trepidation that I have been through for the last ump-teen years!

The day before you want to bake bread, take your start out of the fridge (this recipe is using 4 C. of sourdough start) and mix in 5 C. whole wheat flour and 5 C. water. Mix well.

Cover bowl with a cloth and allow it to rest in a warm place (hard to find in my house!) for 12-24 hours.

In the morning, or when ready to make bread, mix the bowl of sourdough again as separation may have occurred.

Take out 1 C. of start and place in a clean glass bowl or jar. Feed this with 2 C. whole wheat flour and 2 C. cool water. This is your new start. Place your container, loosely covered, in a warm place for 8 – 12 hours and ignore it.

Pour your remaining sourdough into your mixing bowl and add 2 1/2 C. cold water, 2 TB. salt (opt.), 1/4 C. honey (opt.), and 5 C. whole wheat flour. Mix to blend.

Slowly add in more flour to a moderately stiff dough that is smooth and elastic. You should be able to stick your finger into the dough and pull it out without sticky residue on it.

Continue kneading for a total of 10 minutes, including the time it took to get your dough to the right consistency.

Place the dough on your counter and divide into fourths. Shape each quarter and place in oiled loaf pans. I use these and LOVE them.

Let loaves rest in a warm place until doubled in size. Rising time depends on temperature and humidity, plan about 4-7 hours.

Bake at 350 degrees for 35 minutes.

Take out loaves and brush tops with butter, if desired. Place on cooling rack. Then eat them…and be amazed at yourself.

At the end of the day or after 8-12 hours from when you started this whole process, find the start you set aside and ignored, put a tight lid on your container and place it in the refrigerator for up to a week. When you are ready to make bread again, take your start out the day before you want to bake and start back up there at the beginning.

Now, I have to say, if I can do this, ANYONE can do this. I promise. I am NOT a baker and I swear I could win a gazillion bucks if I just kept a video camera in my kitchen at all times to catch the ridiculous things I do.

But this? It is SO not hard. It is easy. It has four measly ingredients…no yeast, no oil, no gluten-enhancer, no citric acid, no potato water, no nothing…and it turns out delicious!

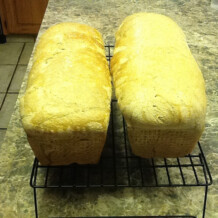
Here is a picture of my first batch:
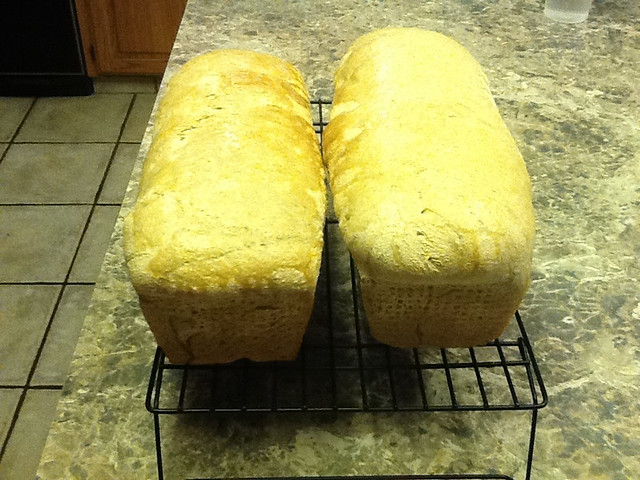
Last night I had three sunny-side up eggs and two pieces of sourdough toast and I thought to myself, “This is amazing. After all this time of being intimidated, I am now eating my very own scrumptious whole-wheat sourdough bread.”

And then I thought, “What else have I let intimidate me? What else could I be learning and doing and enjoying if only I wouldn’t let myself be intimidated by it?”

For more information, check out this sourdough page and of course, the folks over at The Fresh Loaf are full of knowledge about all things bread-y.

p.s. We are now feasting on our warm, fresh from the oven bread…and I think this third batch is the best yet!

read more

Related Posts

Tami’s Famous Chicken Tortilla Soup

Nov 5, 2011 by

Tami…my 2nd cousin and dear, dear friend since the summer we were twelve…has allowed me to post her amazing soup recipe on here.

Trust me…this is scrumptious…make it just like she says and then invite over some company and share it with them. Everyone will love it. We have eaten this at every Cousin Reunion, camping trip, family dinner, or anything else that Tami has attended for the past 5 years or so. I LOVE it!

Ingredients

2 Quarts of water
3-5 Chicken breasts
1/2 tsp. Salt
1 Tb. Onion Powder
1 tsp. Garlic Powder
2 tsp. Dried Cilantro (I like this a lot so usually add a bunch of fresh)
3 tsp. Chicken Boullion Powder (or 3 cubes…)
1 tsp. Ground White Pepper

Directions

Boil all together for at least 30 mins… maybe an hour. It gets nice and tender.

Let it cool at bit and dice (shred) the chicken – return to the broth.

Saute 2 tsp. garlic (2 cloves) and 1 chopped onion in a bit of olive oil. Add to the broth.

At this point, I put it all in a big crockpot, but you can still have it on the stove if you want. (this is also the point where I freeze it to take it camping or just to use later)

Add

2 15 oz Cans Corn – drained
1 10 oz Can Tomato Soup
1 14 oz Can Diced Tomatoes
16 oz Chunky Salsa
2-3 16oz Cans of Beans – can be kidney, black or chili (I drain the kidney and black, but not the chili beans.)
1-3 Tb. Chili Powder (optional – you can just have it on the side for those who want some heat)

Dump it all in – let it simmer for a while. As soon as it heats up it’s ready to eat, but it’s good when it’s been simmering on low for hours too.

Serve with cheese, sour cream and tortilla chips.

I saw a great tip the other day for shredding chicken. After cooking chicken breasts, put them in your mixer and turn on high for about 20 seconds and you will have instant restaurant-style shredded chicken.

Thank you for making it so often for me Tami…and for sharing it with my readers!

read more

Related Posts

pumpkin chocolate chip cookies

Nov 5, 2011 by

So, last night after teaching gymnastics for six hours, I remembered I needed to bring a dozen cookies to our ward’s Green and Gold Ball. Now, I could have just bought a package of 12 measly cookies for 98 cents. I saw a package of minty things at Winco for that very price. But, nooooo, I have to make things difficult for myself. I thought, “I don’t want to eat cookies with garbage ingredients and so I cannot in good conscience take some of those chemical-laden cookies to feed to other people.”

The problem is, I am not a baker and I am not a whip-something-up-at-moments-notice-person either. I have anxiety in two areas of my life…cooking and sewing…and it is almost incapacitating! I made a decision a few years ago to conquer these two areas and I am on the fifty year plan to do so.

I called up my mom and got some advice. Then I called Kat and got some more advice and then she sent me this recipe. I ran to Winco to get mini-chocolate chips, demerara raw sugar (never bought it before as I am a honey girl, but Kat swore I would want to use it), and allspice and then rushed home to make them.

I quickly decided to double the recipe since it called for 16 oz. of pumpkin and my can was 30 oz. Soon I had a mixer full of dough, the ovens preheating, and everyone getting ready for the ball…a lil’ bit of chaos!

Before the ball, I had time to cook about 2 dozen cookies. This morning I got up and made the rest…dozens and dozens of cookies later, I am done and they are cooling and being snatched up by children right and left. My plan was to freeze them and take a few to iFamily each week. I don’t know how many are going to make it into the freezer though!

Here is Katie’s recipe (from Kitchenstewardship.com) with what I did in parentheses:

Ingredients

2 cups butter or coconut oil or palm shortening (I used 2 C. butter and 2 C. coconut oil)
1 1/2 c. sucanat (2 C. demerara and 1 C. honey)
16 oz. can pumpkin or 2 c. pumpkin puree (30 oz. can pumpkin)
2 eggs (4 eggs)
2 tsp. vanilla ( 4 tsp. vanilla)
4 c. white whole wheat flour (8 C. of whole wheat flour)
2 tsp. baking powder (4 tsp. baking powder)
2 tsp. cinnamon (4 tsp. cinnamon)
1 tsp. baking soda (2 tsp. baking soda)
1 tsp.nutmeg (2 tsp. nutmeg)
½ tsp. allspice (1 tsp. allspice)
1 tsp. salt (2 tsp. salt)
2 c. chocolate chips or raisins (4 C. mini chocolate chips)
1 c. chopped nuts

Directions

Cream fat and sweetener. Add pumpkin, eggs and vanilla; beat well. Stir together flour and next 6 dry ingredients. Add to batter; mix well. Stir in choc chips and nuts. Drop rounded teaspoonfuls two inches apart on a greased cookie sheet. Bake at 350 degrees for 12-15 minutes.

Katie, the author of that recipe, nailed it…they are delicious! The aftertaste is even better than the first bite! I think I could eat them all day long.

read more

Related Posts

mega manic muffin mix

Oct 24, 2011 by

mega manic muffin mix

I don’t think I have posted a recipe for awhile and thanks to my recent cleaning of the dining room I found one of my favorite recipe books that was buried behind a gazillion other books in my magazine-style bookshelf (you should see it now…it is super-duper clean!).

5159ZCR1VKL._BO2,204,203,200_PIsitb-sticker-arrow-click,TopRight,35,-76_AA300_SH20_OU01_

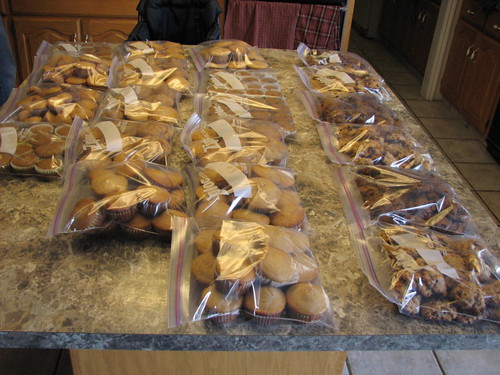
This recipe makes the base for 120 muffins and then you add your liquids when you are ready to whip them up. Once for our homeschool swim camp week I actually made 120 muffins at once with this mix. It was just a lil’ bit crazy to have that many muffins in my kitchen at one time.

IMG_1731

I wonder how well muffins freeze and thaw? If they do freeze well, maybe it would be a good idea to do again and then we could have some ready for the days we are out of the house.

Anyway, here is the base:

10 C. whole wheat pastry flour
5 C. kamut flour
5 C. sucanat (I use honey and add more dry stuff)
2 C. buttermilk, dried
2 C. oats, pulverized
6 TB. baking powder
2 TB. baking soda
2 TB. salt (I use Real Salt)

Mix all ingredients well and keep in a sealed container.

To make a batch of 24 basic muffins, use 5 1/2 C. of muffin mix and add the following:

2 eggs
2 egg whites
3 tsp. vanilla
2 C. water
1/2 C. oil

Mix together and pour into muffin tins. Bake at 400 F for 18-20 minutes.

Variations: There are 800 variations on this theme, made possible by you, the muffin-maker-extraordinaire. I have made pumpkin chocolate chip, apple pie and jam muffins.

Here are some variations from the book:

Apple Pie Muffins
2 1/2 C. grated apple
1 tsp. cinnamon
1/2 tsp. nutmeg

Gingerbread-Style Muffins
1/4 blackstrap molasses
2 TB. ground ginger

Jam Muffins
Add a teaspoon of jam to the middle by filling in half your muffin tin, plopping on some jam, and then filling the tin the rest of the way.

Maple Pecan Muffins
6 TB pure maple syrup
Use only 1 1/2 C. water up above instead of the 2 C. listed
1 C. chopped pecans

I don’t remember what I did when I made the pumpkin chocolate chip muffins, but they were the favorite of everyone at swim camp. I am in the mood for them right now, so if someone has some suggestions for how to make them, let me know and I’ll see if I can pull myself into the kitchen to actually bake some!

read more

Related Posts

kale chips

Mar 7, 2011 by

If I can make it to the grocery store this week, I am going to buy some kale and try out this recipe! Have you ever had kale chips? If so, how do you make them?

“Smoked” Kale Chips
by: Chef Tom- www.cookwithtom.com
Prep time 5 min Cook Time 10 min

* 1 bunch of Kale
* 1 Tbs Extra Virgin Olive Oil or Sesame Oil
* 1 Tbs fine sea salt
* 1 Tsp Smoked Paprika

Wash kale thoroughly, let dry.

With a knife or kitchen scissors, remove the thick stem in the middle of each Kale leaf. Tear the remaining leaf into chip size pieces.

Drizzle kale with Olive Oil, sea salt and smoked paprika

Load sheet tray with one layer of Kale and cook in 350 oven for 10-15 minutes / until edges are slightly brown.

I’ll let you know how they turn out. My guess is that we will love them!

read more

Related Posts

black bean chili

Oct 21, 2010 by

While making this yummy recipe for supper tonight, I realized I had not shared it with all of you. We love this recipe…the kids love it because it is delicious. I love it because it is delicious AND fast AND easy. I am all about fast and easy and I have a really hard time eating food that is not delicious, so this recipe is perfect on all counts.

1 medium onion, chopped
1 green bell pepper, chopped
2 15 oz. cans diced tomatoes
2 15 oz. cans black beans
1 8 oz. can tomato sauce
1 TB. chili powder
2 tsp. cumin
Dash cayenne pepper

Mix all ingredients together and bring to a boil. Reduce heat to low, cover and simmer for 25 – 30 minutes.

We serve ours with chips, cheese, and sour cream when we have it. I always double it and rarely add in the cayenne pepper.

I always make this when we are camping because it is so easy-peasy and it comes in perfect on days when I forget to start dinner till the children are complaining of starvation.

By the way, this recipe comes from the absolutely essential cookbook Boarding the Ark by Jane P. Merrill and Karen M. Sunderland. This treasure trove of a cookbook has many of our favorite recipes in it, including Applesauce Cake, Rice-n-Apple Breakfast, Sweet and Sour Rice, Barley, Rice, and Lentil Soup, and Very Veggie Wraps. It also has a great substitution chart, lots of valuable food storage info, healing remedies from the past, and an equivalent measure chart that I use all the time.

Enjoy!

read more

Related Posts

debbie’s caramel popcorn

Jun 29, 2010 by

My dear friend, Debbie, makes this popcorn every Sunday afternoon. It is delish! Keziah has been making it lately for us and we are loving it.

1/2 c. popcorn – pop it
1 stick butter
1 c. honey

Boil butter & honey together for a couple
of minutes.

In a big bowl, drizzle on to the popcorn while stirring. It shouldn’t crunch. If it crunches you need more liquid.

Butter a cookie sheet really well.

Spread the popcorn on the cookie sheet.

Cook at 350 degrees for 5-7 minutes. It should be light-medium brown.

read more

Related Posts

gluten-free carrot cupcakes

May 24, 2010 by

I was invited to a lovely luncheon with one of my recent doula clients and among veggies, sprouts, hummus, guacamole, and other delicacies, there were these scrumptious gluten-free carrot cupcakes. I know I have some readers who are following a celiac diet and these will be perfect for them, but they are so yummy that everyone will love them!

Muffins

3 C. Carrots, peeled, grated
1 1/2 C. Brown Rice Flour
1/2 C. Potato Starch
1 TB. Xanthan Gum
1 tsp. Cinnamon
1 tsp. Salt
1 tsp. Baking Soda
1 tsp. Baking Powder
4 Large Eggs
1 1/2 – 1 3/4 C. Sugar (I haven’t tried substituting honey yet, but I will be trying it!)
1/2 C. Applesauce
1/4 C. Oil
1 tsp. Vanilla Extract
1 C. Chopped Nuts or Raisins (I use pecans)

Frosting

1/3 C. Cream Cheese
1/4 C. Butter
1 tsp. Vanilla Extract
2 C. Powdered Sugar

Muffin Directions

1. Preheat oven to 325 F.
2. Chop carrots in food processor
3. Stir flour, potato starch, xanthan gum, cinnamon, salt, baking soda, and baking powder together and set aside.
4. In large mixing bowl, beat eggs until well blended.
5. Add sugar, applesauce, oil and vanilla. Mix well.
6. Add flour mixture and nuts.
7. Blend until just mixed.
8. Spoon into muffin tins (with liner) about 3/4 full.
9. Bake about 20-24 minutes or until springy to touch.
10. Cool completely before frosting.

Frosting Directions

1. Let cream cheese and butter come to room temperature.
2. Blend with vanilla extract, then beat in the powdered sugar. Use a little milk if not the right consistency.

Let me know how you like them!

read more

Related Posts

Our Favorite Dips

Mar 9, 2010 by

We have been making this dip for years – it is so yummy! It comes from the LLL cookbook Whole Foods for the Whole Family, one of the best cookbooks ever.

1 C. Yogurt
1/2 – 1 C. Cottage Cheese
1/2 – 1 C. Mayonnaise
Salt and Pepper to Taste

Seasoning Options:
1. 1 tsp. to 1 TB. dill weed, 1 – 2 TB. minced onion, 1 tsp. garlic powder, dash of tamari or Worcestershire sauce

2. 1/2 C. minced cucumber, 2 TB. minced parsley, 1 tsp. garlic powder, 1/4 C. minced green onions

3. 1/2 C. shredded Cheddar cheese or other sharp cheese, 2 TB. grated Parmesan cheese, 1/4 minced green onions (this option is our favorite – you know I LOVE cheese!)

4. 1 tsp. – 1 TB. prepared horseradish, 2 TB. minced onion

5. 1 tsp. – 1 TB. curry powder, 2 – 4 TB. sesame seeds

6. 1 – 2 TB. crushed anchovy fillets, 1/4 C. grated Parmesan cheese, 1/4 C. minced green onions, 1 tsp. garlic powder (never tried this one – not an anchovy girl!)

7. 1 lb. fresh spinach, steamed, drained, and chopped or frozen spinach, thawed and drained and 1/4 – 1/2 C. minced green onions (our second favorite)

We make this to dip veggies and crackers in. It makes a pretty large portion, so it should last your family for several days. All the options are yummy (well, with the exception of the anchovy one…it may be yummy, but I can’t speak for it as I have never come with 10 feet of an anchovy in my life).

Enjoy!

read more

Related Posts

creamed eggs

Jan 3, 2010 by

When I was a little girl, my mother made creamed eggs. I don’t know how often she made them, but I have the memory in my mind that we had them every Easter morning. My childhood memories are quite warped, so it is possible we only had them once or twice or that we really did eat them every Easter or that it had nothing to do with Easter and she made them when she was in the mood to make them with no rhyme or reason to it at all. Nevertheless, they are one of my favorite foods. They represent family, safety, motherhood, love, Jesus, and joy. So, we eat them for Christmas morning breakfast. Every year. We love them. They are soooo yummy, but more than yummy-ness, they are part of Christmas, part of family, part of celebrating our Savior’s birth. I don’t know what they represent to my children, but I do know they expect them on Christmas morning and enjoy every single bite.

For anyone who has never had creamed eggs, here is my mother’s recipe:

2 sticks of butter
1 C. flour (we use whole wheat, but the sauce is a nicer color of cream if you use white flour)
4 C. milk
18 hard boiled eggs
Lots of Nature’s Seasoning Salt

Melt the butter and stir in the flour until it is all creamy. Then take your pan off the heat and add in your milk while whisking. Place pan back on the heat and stir until it is thick. Cut up the eggs and add them into the sauce. Shake on the Nature’s till it tastes perfect. Serve over toast.

What are the foods that add meaning to your traditions? How did you decide upon them?

read more

Related Posts

the divine salad

Nov 8, 2009 by

I forgot some things of the divine salad ingredients in my thankful thursdays post. So here it is all fixed up with everything included. (Thanks Kari!)

Mesclun or Spring Mix lettuce
Avocado, diced
Strawberries, sliced
Slivered almonds, toasted
Pomegranate seeds
Tomatoes, diced
Cucumber, sliced
Mandarin oranges, drained
Brianna’s Poppy seed dressing

Make it for lunch tomorrow and your taste buds will thank you. Promise.

read more

Related Posts

broccoli & potato soup

Nov 1, 2009 by

It is high time we have another recipe on here, don’t you think? Well, today, I thought I would share one of favorites in terms of tastiness AND prep-time. I am all about not spending a lot of time in the kitchen, but I also like my food to taste good, so this recipe is perfect for me.

This is another recipe from Diane Hopkin’s book Hopkins’ Healthy Home Cooking. Have I already said “you need to buy this book!” Let me say it again…buy it. Go to Latter-Day Family Resources and put it in your cart today. It is chock full of yummy, simple, and healthy recipes!

Broccoli and Potato Soup

Red Potatoes
Broccoli

Scrub unpeeled potatoes, cut in half, and put in a large pot. Wash and trim broccoli and put on top of the potatoes. You should have a little more broccoli than potatoes. Add water to 1″ above the vegetables and simmer until they are tender. Puree in the blender with enough of the cooking water to make a thick soup consistency. Season with salt and pepper.

If you are like me and enjoy cheese, then put it back into the pan and add some cheese in a little at a time while stirring to help it melt smoothly.

It is perfect for fall and winter nights and would be yummy with whole wheat sourdough garlic bread.

Enjoy!

read more

Related Posts

favorite playdough

Oct 23, 2009 by

This playdough is the softest, bestest (yes, I know it is not a word, but I love it anyway), most squeezable dough in existence. Fisher was begging for some today, so I thought I would share the recipe with all of you lovelies.

2 1/2 cups flour
1/2 cup salt
2 packages Kool-Aid (you decide the flavor!) Don’t use cheapo brands…use Kool-Aid
2 cups boiling water
3 tablespoons oil

Mix dry ingredients, then add wet.

Knead until smooth (Careful– it’s hot! It may take a minute or two before you can really ditch the spoon and get your hands in there!) You may need to add extra flour for desired consistency. Will be sticky for a little while, but then will just turn soft and squishy. If it stays sticky after 5+ minutes of kneading, add more flour. Sometimes I knead for awhile and then put it in the fridge for about an hour to cool it off and let it get less sticky and when I pull it out, it is perfect. You’ll figure it out!

Our favorite flavors are orange and lemon. They smell yummy and don’t stain hands or counters. Keep it stored in a ziploc bag with the air squeezed out and it should keep for several months. It makes great birthday presents and I always recommend it or make it for big sisters and brothers in families I am a doula for.

Try it, try it, you will see, you will like it in a tree…sorry, that is one of Fisher’s favorite books and it keeps running through my head as I type this post…but really, try it and let me know how you like it. Actually, I already know you will love it!

A funny story about this playdough is that when Blythe was little she had no idea what white flour and Kool-aid are used for by the majority of Americans. They were playdough ingredients to her because that is all we ever bought them for. Once at a ward party, she asked what was in the cups. I told her Kool-Aid, to which she pulled the most grossed out face ever. She was disgusted at the thought of drinking playdough ingredients. I had to explain to her that some people drink the stuff, to which she replied “that is a non-food item.”

read more

Related Posts

syrup

Oct 14, 2009 by

After the post about Annesley and the syrup debacle, I have had some requests for our favorite syrup recipes, so here you go:

Fruit Juice Syrup

2 C. fruit juice
2 TB. arrowroot or cornstarch
1/3 C. honey
1 TB. lemon juice

Mix everything together and heat until syrup thickens to desired consistency.

Deluxe Fruit Topping

3 C. fresh or frozen fruit
1/2 C. honey
1 TB. lemon juice

Heat frozen fruit till you can mask it and then blend in other ingredients. If using fresh fruit, just blend in the ingredients and mash. You can even do it in the blender if you would like.

Honey Maple Syrup

1 C. water
1 C. honey
1/2 C. pure maple syrup or 2 tsp. maple flavor

Heat all ingredients until hot, but do not boil.

Hope you enjoy these as much as we do. They are all taken from Erleen Tilton’s book Enjoy Nature’s Harvest, which is a GOLD mine of fabulous recipes…truly a must have for the whole-foods kitchen.

p.s. I am on a posting spree lately…I really need to be on a cleaning spree and get this house in order…but it is so much fun to share my thoughts with the world, I just can’t stop. I have gobs of ideas of things I want to write about and not nearly enough time to do it!

My post for tomorrow is all ready to go and it is fabulous…I can’t wait to share it with ya’ll. Stay tuned till 12:01 and then it will be here, ready for you to delight in…at least, I will be delighting in it!

read more

Related Posts

Cashew Cream Parfait

Oct 14, 2009 by

Ahhhhh.

Yummmm.

Delish.

Exquisite.

I totally splurged yesterday on strawberries, kiwis, honey, and cashews so I could make this fabulous breakfast I read about at Anne’s blog. She got the recipe from Taste Buddies.

It is so delightful – go make it right now.

I am on my third bowl, because I have to finish up Fisher’s and Annesley’s…this is way to good for the chicken bucket.

read more

Related Posts

favorite zucchini casserole

Oct 13, 2009 by

Got some zucchini still?

Here is another of our favorite recipes from Diane Hopkins. This is taken from her book Hopkin’s Healthy Home Cooking. If you are looking for an easy way to start eating with whole grains and lots of veggies AND you don’t want to use weird ingredients, this is the book for you. We have used this book so much, we had to buy a new one because we couldn’t read some of the recipes any longer. We have loved every recipe we have made from this book – they are tried and true on all sorts of families. Some of our favorites are broccoli and potato soup, mexican rice, mexicali squash, graham crackers, tortillas, fiesta salad, homemade ketchup, cheater’s white sauce, heavenly marinade, tortilla soup, pumpkin cookies, and of course, her cook and freeze italian sauce. You can buy the book from her website, Latter-day Family Resources.

It is so yummmm.

4 large (10″ long) zucchini, chopped
4 large tomatoes, chopped
1 tsp. oregano powder
1/4 tsp. pepper
1/2 tsp. salt
1/2 cup sour cream or plain yogurt
1/2 cup grated cheese

Steam zucchini and put in a 9 x 13 baking dish. Top with raw chopped tomatoes. There should be equal portions of zucchini and tomatoes. Combine sour cream with spices and dot on top. Sprinkle cheese over the top and put under the broiler just long enough to melt the cheese. Tomatoes will be warm, but not cooked.

We love this meal! I think I will make it tonight since just talking about it makes my mouth water and my heart leap with anticipation. We haven’t had it since last fall – I think it is high time!

read more

Related Posts

the famous zucchini soup

Sep 14, 2009 by

Let me just say that everyone who has ever tasted this soup has loved it. LOVED it. Richard made it once for a potluck cooking contest and won first place and a huge basket of goodies from Great Harvest. Yes, my husband is awesome. Not only does he frequently cook in our home (because I am not the greatest cook in the world and there are about a million things I would rather do than prepare a meal), he also wins prizes! He should be a chef in his next life. Or maybe this one – how much do chefs make?

To be honest, we stole this recipe from Richard’s mom. She has made it for years and we loved it, so we started making it as well. Now it is my go-to recipe whenever someone has a baby, an illness, or just needs some love.

So if you are looking for a way to use up all your excess zucchini, cut it up into 7 C. portions and freeze it so you can make it all winter long, or if you are in a lazy/overwhelmed/I-never-want-to-see-another-zucchini-in-my-life mode, just bring it to me and I will freeze it and someday when I am feeling energetic, I will make you some soup!

The real recipe with what I do in parentheses:

1 1/2 lbs. ground beef (I never put this in, but you can and it is delish with it. I have put in soaked wheat to mimic the feel of hamburger and it was a success as well, but usually I never bother with any of these options and just start by sauteing the celery in a little water.)

2 C. chopped celery

6-7 C. peeled and chopped zucchini (I do 7 C and never peel it. I also just slice it, not chop it)

1 1/2 C. onions or 6 TB. dried onion

28 oz. can diced tomatoes

1 large can V-8 juice (absolutely essential – do not substitute tomato juice!)

2 tsp. salt

1 tsp. italian seasoning

1 tsp. oregano

1/2 tsp. basil (I always do a heaping tsp. – we love basil!)

1/2 tsp. garlic powder

2 green peppers chopped

Shredded parmesan or mozzarella (I use parmesan)

1. Brown hamburger
2. Add celery and cook for 10 minutes
3. Add everything else except green peppers and parmesan and cook for 20 minutes
4. Add green peppers and cook for 5 more minutes.
5. Add cheese and serve

So yummy and it warms the soul on those cold winter days that are sure to come, so freeze that surplus zucchini now and enjoy it for months on end.

read more

Related Posts

green spaghetti

Jul 22, 2009 by

Time for another of our favorite recipes!I think my girls told Melinda, our first violin teacher, over and over how much they LOVED green spaghetti. Since she reads this blog, I decided it was time I give her the recipe – and all the rest of you can enjoy it as well. It is de-lish!

10 oz. fresh or frozen spinach
1/4 C. warm chicken broth
1/2 C. grated parmesan cheese
1/2 C. milk
1 lb. spaghetti, cooked and drained
1/4 C. butter

Steam fresh spinach just until wilted or frozen spinach until warm. Combine spinach and cooking liquid with warm broth in blender container; process until smooth. Add cheese and milk. Toss spaghetti with butter in serving bowl. Add spinach mixture; toss to mix well. May substitute broccoli for spinach and cream or yogurt for milk. You can also substitute brown rice for the spaghetti.

Taken from Whole Foods for the Whole Family, La Leche League International, page 165.

We love this dish! It turns our faces green, especially those of us under the age of 5, so be prepared for some mess, unless, of course, you are much neater eaters than we are!

read more

Related Posts

quinoa and spinach

Jul 15, 2009 by

I have made this dish for years and it is one of our favorites. I always make it for our annual Green Canyon potluck during Homeschool Week. I make it for lunch all the time and then my children eat it as leftovers the next few days. I get lots of requests for this recipe and just last night I promised two new friends I would post it here for them. I am somewhat mortified over how easy it is…y’all thought I was slaving over this gourmet dish and come to find out, it takes minutes!

Cook 3 cups dried quinoa (pronounced keen-wa) in 6 cups water. Bring to a boil, turn to low and cover. Do not lift lid, stir, or anything else…just let it cook for about 15-20 minutes. Meanwhile, heat up 2 pkgs. frozen spinach. When it is hot, drain out the water and stir it into the cooked quinoa. Add in grated cheese or parmesan (we prefer the parmesan).

Yummm!

read more

Related Posts

yummy applesauce cake

Jun 23, 2009 by

My friend, Kate, asked me to send her this recipe for yummy applesauce cake and I remembered I had promised it to a lot of people after my 35th birthday party. This has been our birthday cake for years! Recently we have been doing a few ice cream cakes, but this one is still our stand-by. We discovered it when Blythe was a baby and quite allergic to pretty much everything processed. This recipe doesn’t have eggs or milk (which ironically Blythe was never allergic to), so it is great for people with those issues. It is made from stuff you should have in your food storage, so you can make it all the time, even if you are in desperate straits!

1/2 C. oil
3/4 C. honey
1 C. applesauce or other pureed fruit
2 C. whole wheat flour
1/2 tsp. salt
1 tsp. soda
1 tsp. cinnamon
1/2 tsp. cloves
1/2 tsp. nutmeg
1/2 C. raisins

I always double it and still put it in one pan, then it is nice and thick and dense. I never put in the raisins, but maybe they would be good.

Combine oil, honey, applesauce, flour, salt, soda, cinnamon, cloves, and nutmeg in bowl. Mix on medium speed for 3-4 minutes. Stir in raisins. Pour into lightly greased 9 x 13 pan. Bake at 350 for 20 to 25 minutes. If you double it like I do, bake for 40-50 minutes.

Enjoy!

read more

Related Posts

scrumdeliumptious italian sauce

May 20, 2009 by

If that isn’t a word it should be because I use it all the time – only when it is completely fitting, of course.

Today I made my favorite spaghetti sauce. We use this to dip garlic bread in, pile it on top of pasta, and it is yummmm as a pizza sauce. If you want to make it yourself, here is the recipe:

In a huge pot, combine:
1 #10 can whole tomatoes, pureed in a food processor
1 #10 can crushed tomatoes
1 #10 can tomato sauce
1 6 oz. can tomato paste
2 10 oz. pkgs. frozen spinach

Process until finely diced in a food processor (although I just throw my vegetables in the blender with the whole tomatoes and chop them up while I am pureeing):
2 broccoli stalks
2 onions
6 cloves garlic
5 carrots
1 stalk celery
1 lb. fresh mushroom (I have never put in the mushrooms…I hate ’em!)

Season with:
2 bay leaves, broken in half to release the flavor
2 tsp. sage
1/2 tsp. thyme
2 tsp. rosemary
1 TB. basil

Mix vegetables and spices in the sauce and simmer for at least 45 minutes. It tastes even better if you simmer it for several hours, letting the seasonings bring out their full flavor. Cool thoroughly, scoop into containers and freeze.

I usually make this in the fall when I have bushels of fresh tomatoes. Then I don’t use the #10 cans, I use fresh and make crushed, sauced, and pureed tomatoes and then measure them into empty #10 cans to make sure I have the right amount.

By Diane Hopkins in “Hopkins Healthy Home Cooking.”

If you are coming to Green Canyon, feel free to swing by my camp for a sample on spaghetti night.

read more

Related Posts

annesley’s favorite granola

May 18, 2009 by

A few months ago my friend Mary Beth brought me over some granola to try out. We all loved it, but my baby Annesley LOVED it! She wants it all the time! I think you will love it as well! We have made it several times since and have made some variations, but this is our favorite version. For those of you who will be going to Green Canyon, I will have some there for you to sample…just come and ask…or make it up yourself this week so you can have it while you are camping.

4 C. Rolled Oats
1 C. Wheat Germ
1 C. Dried Unsweetened Coconut
1/4 C. Sesame Seeds
1/2 tsp. Salt
1 C. Oil (she used Coconut oil)
3/4 C. Honey
2 C. Dried Fruit or Nuts (She used 1/2 C. Chopped Pecans, 1 C. Sunflower Seeds, 1/4 C. Flax Seed, 1/4 C. Millet)

Mix dry stuff in bowl. Mix oil and honey in pan and heat until thin and will drizzle. Spread on two greased cookie sheets and bake at 300 degrees for 20 minutes. You can eat with milk (and it is super yummy that way), but we have been loving it dry as finger food.

Enjoy!

read more

Related Posts

homemade laundry soap

May 18, 2009 by

Lots of people ask me about this recipe, so I thought I would share it here and bless everyone else with it!

This laundry soap will cost you $25 – $28 for about a year’s worth of soap. I have four children and do lots of laundry and it will last me longer than a year. Your usage will vary, so it will last longer or shorter.

2 boxes Borax (I use 20 Mule Team Borax)
2 boxes Washing Soda
16 bars Fels-Naptha soap

Grate the Fels-Naptha, probably the finer the grate, the better. Add it to the other stuff and stir all together. Use 1 TB. per batch…yes, only 1 TB!!!! It works great!

If you are local, the best place to get the ingredients is WINCO.

Enjoy the laundry…the never ending opportunity to develop patience, endurance, and chemical know-how.

read more

Related Posts

live morning milkshake

May 4, 2009 by

Here is the smoothie recipe that I promised a few days ago:

1/4 c. hulled buckwheat
2 tsp. sesame seeds
2 tsp. flax seeds
5 – 10 almonds
1/2 c. milk (any kind, water works in a pinch)
1/2 c. plain yogurt or kefir
1 tsp. vanilla
1 TB. honey, agave, or 3 dates
Fruit, fresh or frozen (we like 1 banana and 3 strawberries)
1/2 c. ice, if the fruit was not frozen.

Soak first 4 ingredients overnight in a pint jar, covered well with water. In the morning, drain and rinse. Pour this mixture into blender with remaining ingredients. Whiz until well-blended and creamy. Serves 1 adult.

This drink is so incredibly scrumptious. It is from Kim Simmerman’s recipe book “Granola to Green: Nourishing, Frugal, and Simple Meals for Vibrant Health.” You can order her book by emailing her at kimberlysimmerman@gmail.com. It is full of fabulous recipes, nutrition information, and time-saving tips. I cannot recommend it highly enough! If you decide to order one, let her know I sent you!

read more

Related Posts